PostgreSQL NodeJS Tutorial
Using PostgreSQL from Node.js
PostgreSQL is a very popular open source database. It is widely used for almost all types of applications. Node.js has very good modules to work with PostgreSQL database. In this article, I am going to show you how to connect to a PostgreSQL database from Node.js. I will use a Node.js module called ‘node-postgres’ to integrate Node.js and PostgreSQL. Let’s get started.
Pre-requisites:
First you have to make sure that Node.js, NPM and PostgreSQL are installed and running. You can install and configure PostgreSQL from How to Install PostgreSQL on Ubuntu Linux: The Easy Wayand Node.js and NPM from How to install NPM if you don’t have them installed already.
Now check whether Node.js is working with the following command:
$ node --version
Now check whether NPM is working with the following command:
$ npm --version
Now check whether PostgreSQL is working with the following command:
Now create a directory ‘postgre-node’.
Then navigate to the directory you just created with the following command:
$ cd Documents/postgre-node
Then you should run the following command to create a ‘package.json’ file.
$ npm init -y
You can see from the screenshot below that a ‘package.json’ file is created.
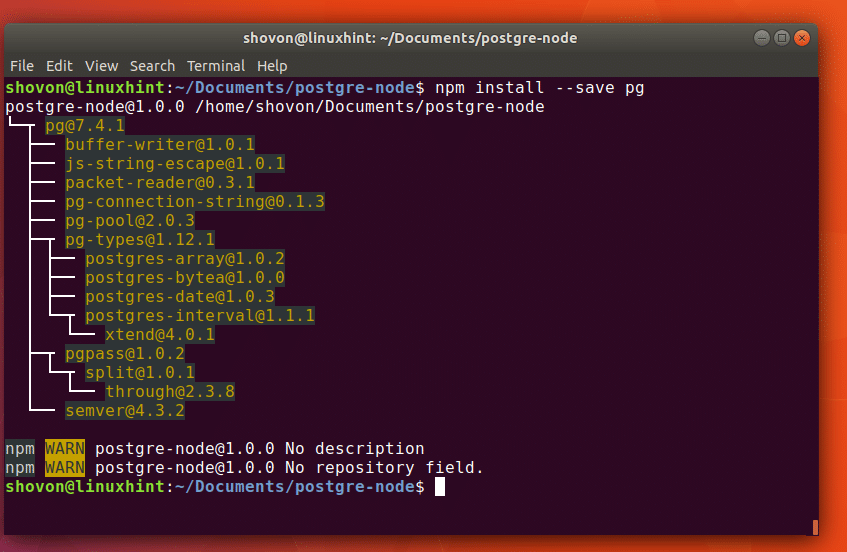
Now install ‘node-postgres’ Node.js module using NPM with the following command. If you remember, ‘node-postgres’ is a PostgreSQL Client for Node.js.
$ npm install --save pg
‘node-postgres’ should be installed.
Using ‘node-postgres’ PostgreSQL Node.js Client:
Now inside the directory ‘
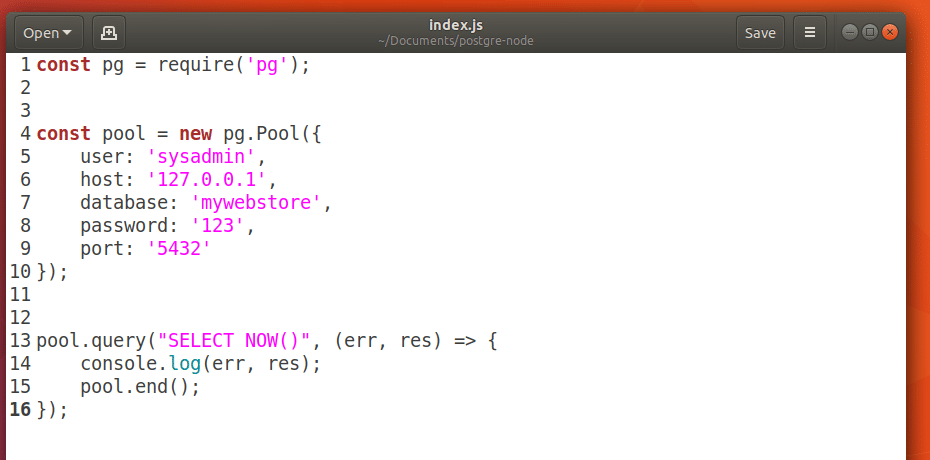
postgres-node’, create a new file ‘index.js’ and write the following codes as shown in the screenshot below.
const pg = require(‘pg’);
const pool = new pg.Pool({
user: ‘sysadmin’,
host: ‘127.0.0.1’,
database: ‘mywebstore’,
password: ‘123’,
port: ‘5432’});
pool.query(“SELECT NOW()”, (err, res) => {
console.log(err, res);
pool.end();
});
const pool = new pg.Pool({
user: ‘sysadmin’,
host: ‘127.0.0.1’,
database: ‘mywebstore’,
password: ‘123’,
port: ‘5432’});
pool.query(“SELECT NOW()”, (err, res) => {
console.log(err, res);
pool.end();
});
Here
const pg = require(‘pg’) imports ‘node-postgres’ Node.js module.
Then I created a Pool using
pg.Pool with PostgreSQL login credentials. I didn’t change anything from the article for setting up PostgreSQL in the “Pre-requisites” section. You may take a look at it again.
I simply retrieved the current date and time using the PostgreSQL
NOW() function using pool.query()method of ‘node-postgres’.
I ran SQL statements “
SELECT NOW()”.
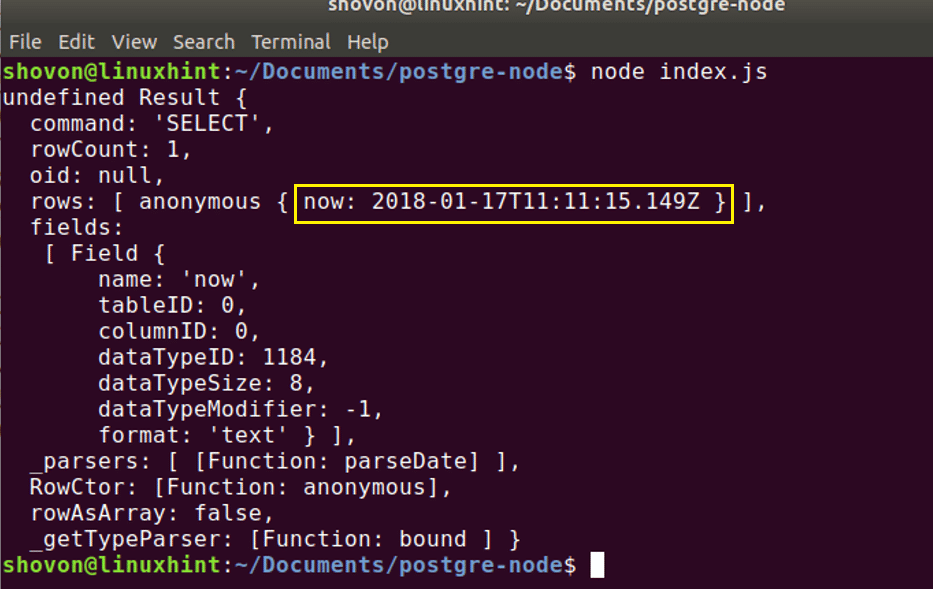
Now if I save the ‘index.js’ file and run the Node.js source file with the following command:
$ node index.js
You should see current TIMESTAMP on the output as shown in the screenshot below.
Creating a Table:
Now I am going to create a new Table ‘users’ using the following query:
# CREATE TABLE users(id SERIAL PRIMARY KEY, firstName VARCHAR(40) NOT NULL,
lastName VARCHAR(40) NOT NULL)
lastName VARCHAR(40) NOT NULL)
The ‘users’ table has 3 fields, id, firstName and lastName. id is an integer and firstName and lastName fields are strings.
The source code is given on the screenshot given below.
const pg = require(‘pg’);
const pool = new pg.Pool({
user: ‘sysadmin’,
host: ‘127.0.0.1’,
database: ‘mywebstore’,
password: ‘123’,
port: ‘5432’});
pool.query(“CREATE TABLE users(id SERIAL PRIMARY KEY, firstname VARCHAR(40) NOT NULL,
lastName VARCHAR(40) NOT NULL)”, (err, res) => {
console.log(err, res);
pool.end();
});
const pool = new pg.Pool({
user: ‘sysadmin’,
host: ‘127.0.0.1’,
database: ‘mywebstore’,
password: ‘123’,
port: ‘5432’});
pool.query(“CREATE TABLE users(id SERIAL PRIMARY KEY, firstname VARCHAR(40) NOT NULL,
lastName VARCHAR(40) NOT NULL)”, (err, res) => {
console.log(err, res);
pool.end();
});
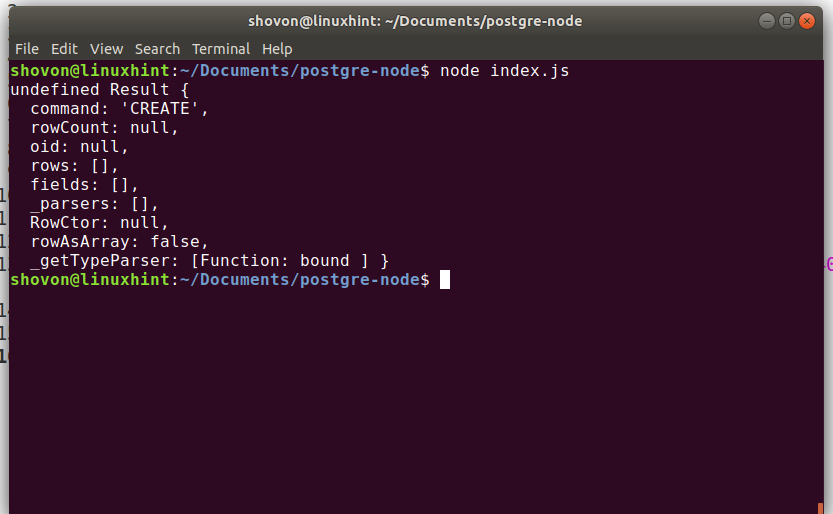
Now if I run the code, you should see the following output.
Now let’s login to the ‘mywebstore’ datastore as ‘sysadmin’ user with the following command:
$ psql -U sysadmin -h127.0.0.1 mywebstore
It should ask you for the ‘mywebstore’ datastore’s password. Type in the password and press <Enter>
You should be logged into the PostgreSQL console as shown in the screen below.
Now run the following command to see all the tables:
mywebstore=> \dt
You should see ‘users’ table as shown in the screenshot.
You can run the following command to quit PostgreSQL command line interface:
mywebstore=> \q
Inserting into Table:
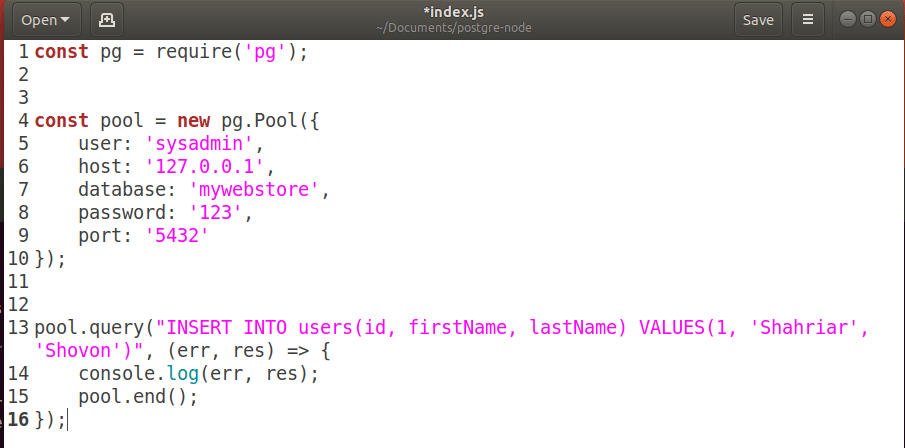
Now you can insert into the ‘users’ table with the following command:
# INSERT INTO users(id, firstName, lastName) VALUES(1, ‘Shahriar’, ‘Shovon’)
The source code is given in the screenshot below.
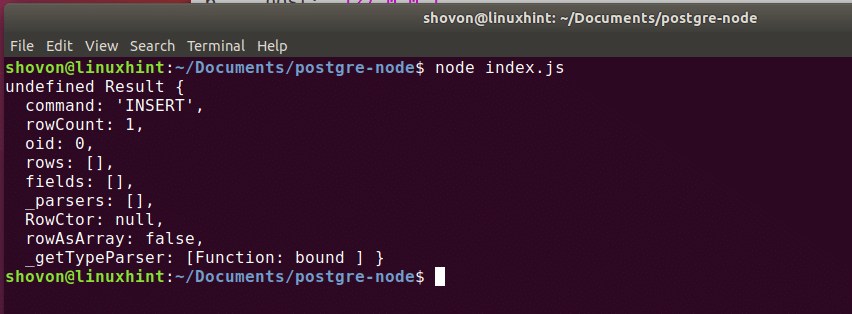
Now if you run the source code, you should see the following output.
Now you can login to the PostgreSQL command line interface with the following command like before:
$ psql -U sysadmin -h127.0.0.1 mywebstore
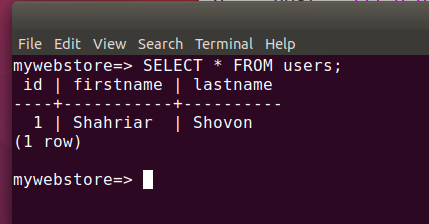
Run the following SQL query:
$ SELECT * FROM users;
You should see the data you inserted as shown in the screenshot below.
Retrieving Data from PostgreSQL:
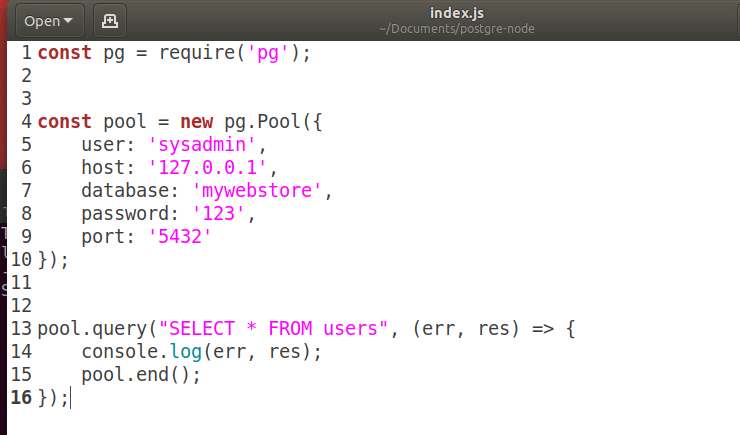
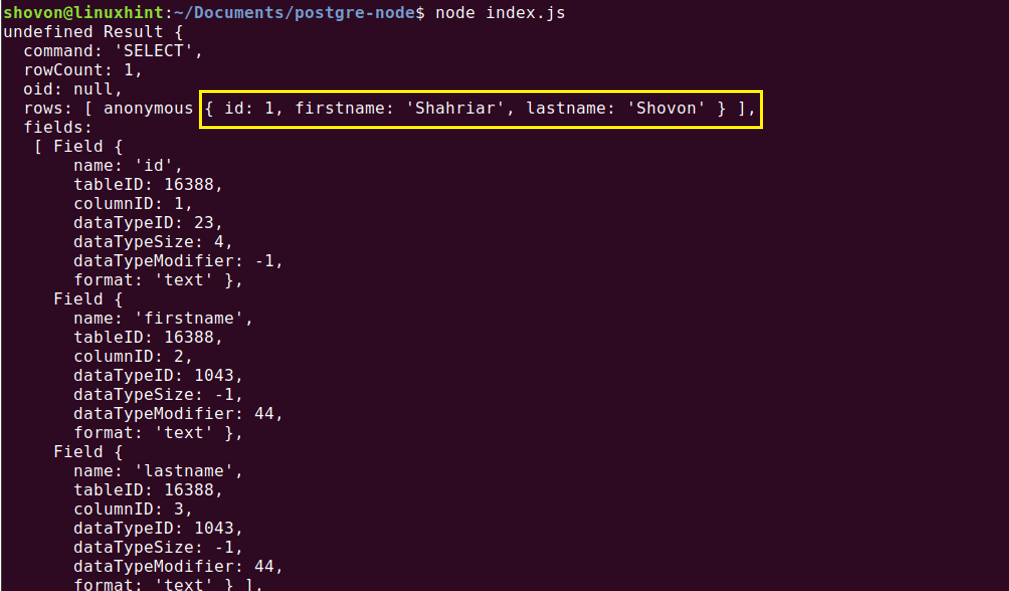
You simply execute the following SQL statement to retrieve the data:
# SELECT * FROM users;
The other steps are similar. So I am not going to explain them again as it is out of scope of this article.
Updating data:
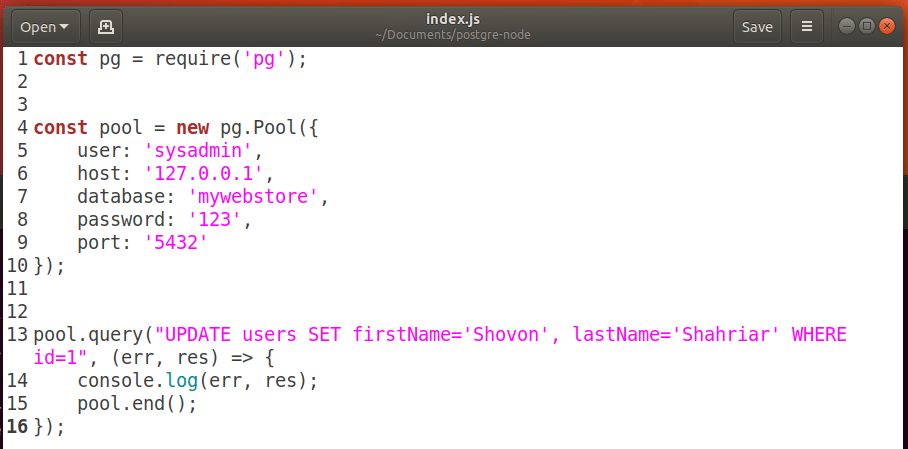
To update an existing row of PostgreSQL’s users table, run the following SQL query:
# UPDATE users SET firstName=’Shovon’, lastName=’Shahriar’ WHERE id=1
Here ‘
id’ is the primary key which is unique to each column of the users table.
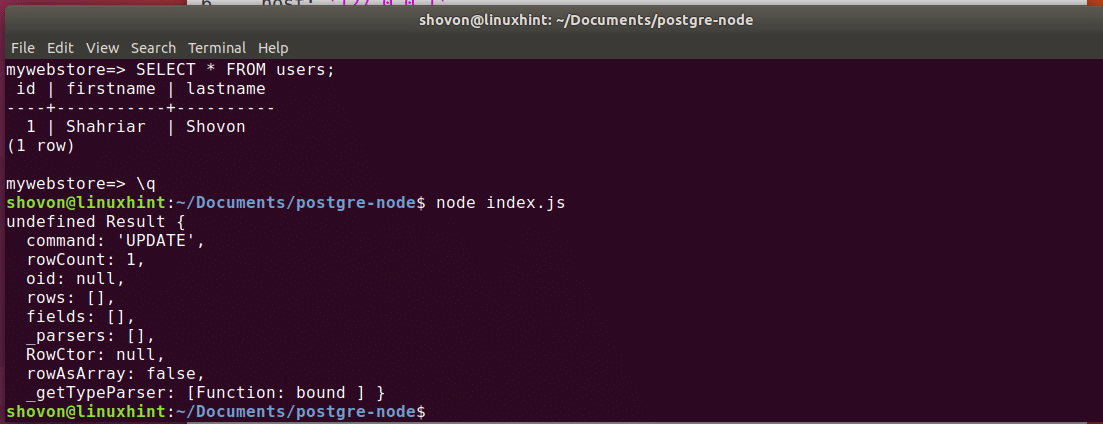
After you run this code,
firstName and lastName should be updated as shown in the screenshot below.Deleting a Column from PostgreSQL:
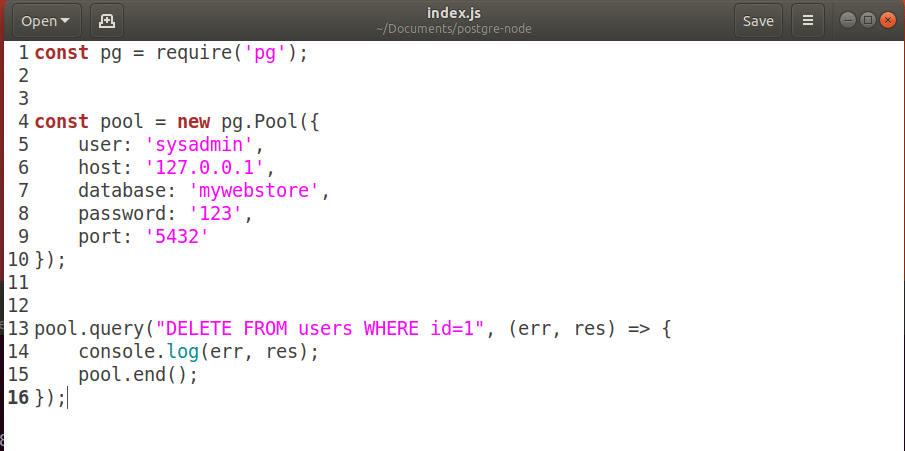
You can run the following SQL statement to delete a column from the PostgreSQL.
# DELETE FROM users WHERE id=1
Here
id is the primary key of the users table.
Once you login to the PostgreSQL command line interface, you should not find the row you just deleted. In this case, I have an empty table. Because I had only 1 row in the users table.
That’s how you perform CRUD operation with PostgreSQL using Node.js, and thanks for reading this article.










0 comentarios:
Publicar un comentario