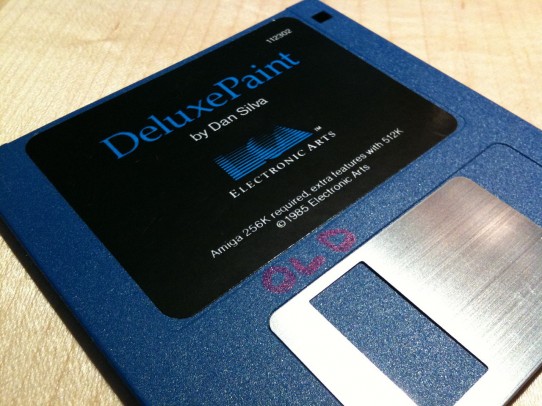
Amiga delux paint
eluxe Paint
Deluxe Paint (DPaint) es un programa de dibujo de imágenes de mapas de bits creado por Dan Silva para Electronic Arts (EA). La versión original fue creada para los ordenadores Commodore Amiga y lanzada en noviembre de 1985. Su versión 2 fue portada a otras plataformas (no así las versiones posteriores 3, 4 y 5), pero fue sólo en Amiga, donde la aplicación obtuvo el estatus de aplicación estrella, es decir, de ser una aplicación tan útil que la gente compraba dicho ordenador sólo por el programa.
Deluxe Paint se creó como herramienta interna de desarrollo de gráficos de nombre Prism utilizada por EA. A medida que Silva fue añadiendo más características a Prism, empezó a disponer de potencial comercial. Cuando el Amiga empezó a venderse en el año 1985, el DPaint rápidamente lo siguió. En poco tiempo fue aceptado por la comunidad de usuarios de Amiga y llegó a ser el editor de gráficos estándar para dicha plataforma. Más tarde, el fabricante de Amiga, Commodore International, firmó con EA para incorporar el programa (y sus posteriores versiones 2, 3, 4 y 5) en todos los Amiga salidos de fábrica. Dicho acuerdo duró hasta la bancarrota de Commodore en 1994.
Con el desarrollo del Deluxe Paint, EA introdujo el estándar IFF, el cual permitía encapsular gráficos, textos, animaciones, sonidos y caulquier tipo de datos en un único contenedor. Para los gráficos se usó el ILBM, el cual fue comúnmente usado en Amiga, pero nunca obtuvo la misma aceptación en otras plataformas. DPaint permite almacenar los gráficos como una imagen completa o como brochas (con la extensión .brush en su versión Amiga). DPaint fue usado por múltiples casas de videojuegos para hacer los gráficos de sus juegos (independiéntemente de la plataforma), por ejemplo Lucasarts lo usó para hacer los gráficos de sus aventuras gráficas, como el juego Monkey Island.

Hubo cierta controversia legal sobre las imágenes creadas por el programa en sus primeras versiones. EA argumentaba que los derechos de copyright sobre las imágenes creadas con su software debían ser de su propiedad, puesto que el copyright del programa en sí mismo era suyo. El tribunal determinó, sin embargo, que ellos no eran propietarios de los derechos de los trabajos creados con el programa. Si lo fueran, los desarrolladores de compiladores y otros programas podrían reclamar sus derechos sobre lo creado con sus productos (y por extensión, los fabricantes de papel y lápices podrían reclamar su derechos de cualquier libro escrito con sus herramientas).
El código fuente de la versión 1.0 fue abierto para su consulta y está disponible en el Computer History Museum http://www.computerhistory.org/atchm/electronic-arts-deluxepaint-early-source-code/
Deluxe Paint on the Amiga is a really nice tool for pixel graphics. This is a tutorial on how to use Deluxe Paint as conveniently as possible on a Windows PC. I made a simple console application that makes png images transparent, you can get it here: MakeTransparent.zip. I made a suitable icon for Deluxe Paint, download it here: DeluxePaintIcon.zip.
A short demo of using Deluxe Paint int this way:
These are the steps required:
1. Install WinUAE
2. Add kickstart roms.
3. Choose model: A1200 on the quickstart page.
4. Settings:
Select: Host / Display / Remove interlace artefacts
Deselect: Host / Miscellaneous / Show GUI on startup
Hardware / CPU and FPU: 68040 with FPU CPU internal and select “fastest possible”
Hardware / RAM: 8MB Chip
Deselect: Host / Miscellaneous / Show GUI on startup
Hardware / CPU and FPU: 68040 with FPU CPU internal and select “fastest possible”
Hardware / RAM: 8MB Chip
5. Add a virtual hard drive (Hardware / CD & Hard drives page).
6. Save the configuration with the name Deluxe Paint or something similar.
7. Install Workbench 3.0 to the virtual hard drive created in step 5.
8. Install Deluxe Paint (DP 5 is the latest version).
9. Edit S/Startup-Sequence so Deluxe Paint will start automatically. You can do this in a text editor in Windows, all files on the virtual HDD are available as normal files in Windows.
———————————–
Change:
C:LoadWB
To:
;C:LoadWB
cd HD0:DPaintV/ (Change the path if necessary)
DPaint
———————————–
———————————–
Change:
C:LoadWB
To:
;C:LoadWB
cd HD0:DPaintV/ (Change the path if necessary)
DPaint
———————————–
10. Create a shortcut for WinUAE to the desktop (or anywhere) and edit it to run the configuration you created. Change target for the shortcut to:
“C:\Program Files (x86)\WinUAE\winuae.exe” -f “C:\Program Files (x86)\WinUAE\Configurations\DeluxePaint.uae”
(Change the paths if necessary)
You can also change the icon of the shortcut to the DP icon provided here.
11. Create a shortcut to the folder on the virtual HDD you are saving your images to.
12. Change window size until you have a non-distorted image. I do this by drawing two 45 degree diagonal lines in Deluxe Paint and resize the screen until the lines look perfect. When you are happy with what you see, press F12 and save your WinUAE configuration. (1344 x 1053 seems to work for me). Maybe there is a better way to do this (probably is?).
Converting IFF images to bmp or png
13. Install Irfanview and the plugin pack
14. Create a batch-file in the directory where you save your Deluxe Paint images with the following text:
“C:\Program files (x86)\irfanview\i_view32.exe” *.iff /convert=*.png
(Change the path to Irfanview if you installed it elsewhere)
Name the batch file starting with an underscore so it’s always on top in the folder.
Running the batch-file will convert all the iff images in the directory to bmp-images.
Running the batch-file will convert all the iff images in the directory to bmp-images.
Making the PNG images transparent
15. Copy MakeTransparent.exe to the Windows directory.
16. Add the following line to the batch file you created in step 14:
MakeTransparent *.png /replace /rgb:156,118,140
or
MakeTransparent.exe *.png /replace
or
MakeTransparent.exe *.png /replace
The first alternative will make the defined rgb value transparent, the second alternative will make the color of the top-left pixel transparent in the images.


0 comentarios:
Publicar un comentario