
Introduction to Fabric.js. Part 1.
 Today I'd like to introduce you to Fabric.js — a powerful Javascript library that makes working with HTML5 canvas a breeze. Fabric provides a missing object model for canvas, as well as an SVG parser, layer of interactivity, and a whole suite of other indispensable tools. It is a fully open-source project, licensed under MIT, with many contributions over the years.
I started developing Fabric 3 years ago, after discovering the pains of working with native canvas API. I was creating an interactive design editor for printio.ru — my startup that allows users to design their own apparel. The kind of interactivity we wanted only existed in Flash apps in those days. Even right now, very few come close to what became possible with Fabric.
Let's take a closer look!
Today I'd like to introduce you to Fabric.js — a powerful Javascript library that makes working with HTML5 canvas a breeze. Fabric provides a missing object model for canvas, as well as an SVG parser, layer of interactivity, and a whole suite of other indispensable tools. It is a fully open-source project, licensed under MIT, with many contributions over the years.
I started developing Fabric 3 years ago, after discovering the pains of working with native canvas API. I was creating an interactive design editor for printio.ru — my startup that allows users to design their own apparel. The kind of interactivity we wanted only existed in Flash apps in those days. Even right now, very few come close to what became possible with Fabric.
Let's take a closer look!
Why fabric?
Canvas allows us to create some absolutely amazing graphics on the web these days. But the API it provides is disappointingly low-level. It's one thing if we simply want to draw few basic shapes on canvas and forget about them. But as soon as there's need for any kind of interaction, change of picture at any point, or drawing of more complex shapes — situtation changes dramatically.
Fabric aims to solve this problem.
Native canvas methods only allow us to fire off simple graphic commands, blindly modifying entire canvas bitmap. Want to draw a rectangle? Use fillRect(left, top, width, height). Want to draw a line? Use a combination of moveTo(left, top) and lineTo(x, y). It's as if we're painting canvas with a brush, layering more and more oil on top, with very little control.
Instead of operating on such low level, Fabric provides simple but powerful object model on top of native methods. It takes care of canvas state and rendering, and lets us work with “objects” directly.
Let's take a look at a simple example demonstrating this difference. Let's say we want to draw a red rectangle somewhere on canvas. Here's how we would do this with native <canvas> API.
// reference canvas element (with id="c")
var canvasEl = document.getElementById('c');

// get 2d context to draw on (the "bitmap" mentioned earlier)
var ctx = canvasEl.getContext('2d');

// set fill color of context
ctx.fillStyle = 'red';

// create rectangle at a 100,100 point, with 20x20 dimensions
ctx.fillRect(100, 100, 20, 20);
Now, let's take a look at doing the same with Fabric:
// create a wrapper around native canvas element (with id="c")
var canvas = new fabric.Canvas('c');

// create a rectangle object
var rect = new fabric.Rect({
  left: 100,
  top: 100,
  fill: 'red',
  width: 20,
  height: 20
});

// "add" rectangle onto canvas
canvas.add(rect);
 At this point, there's almost no difference in size — the two examples are pretty similar. However, you can already see how different the approach to working with canvas is. With native methods, we operate on context — an object representing entire canvas bitmap. In Fabric, we operate on objects — instantiate them, change their properties, and add them to canvas. You can see that these objects are first-class citizens in Fabric land.
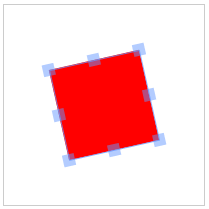
But rendering plain red rectangle is just so boring. We could have at least made something fun with it! Perhaps, rotate slightly?
Let's try 45 degrees. First, using native <canvas> methods:
At this point, there's almost no difference in size — the two examples are pretty similar. However, you can already see how different the approach to working with canvas is. With native methods, we operate on context — an object representing entire canvas bitmap. In Fabric, we operate on objects — instantiate them, change their properties, and add them to canvas. You can see that these objects are first-class citizens in Fabric land.
But rendering plain red rectangle is just so boring. We could have at least made something fun with it! Perhaps, rotate slightly?
Let's try 45 degrees. First, using native <canvas> methods:
var canvasEl = document.getElementById('c');
var ctx = canvasEl.getContext('2d');
ctx.fillStyle = 'red';

ctx.translate(100, 100);
ctx.rotate(Math.PI / 180 * 45);
ctx.fillRect(-10, -10, 20, 20);
and now using Fabric:
var canvas = new fabric.Canvas('c');

// create a rectangle with angle=45
var rect = new fabric.Rect({
  left: 100,
  top: 100,
  fill: 'red',
  width: 20,
  height: 20,
  angle: 45
});

canvas.add(rect);
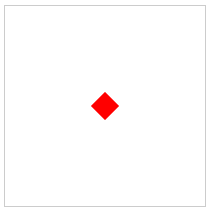 What happened here?
All we had to do in Fabric is change object's “angle” value to
What happened here?
All we had to do in Fabric is change object's “angle” value to 45. With native methods however, things become much more “fun”. Remember that we can't operate on objects. Instead, we tweak positioning and angle of entire canvas bitmap (ctx.translate, ctx.rotate) to suit our needs. We then draw rectangle again, but remembering to offset bitmap properly (-10, -10), so that it's still rendered at the point of 100,100. As a bonus exercise, we had to translate degrees to radians when rotating canvas bitmap.
I'm sure you're starting to see exactly why Fabric exists and how much low-level boilerplate it hides.
But let's take a look at yet another example — keeping track of canvas state.
What if at some point, we wanted to move that now-familiar red rectangle to a slightly different location on canvas? How would we do this without being able to operate on objects? Would we just call another fillRect on a canvas bitmap?
Not quite. Calling another fillRect command actually draws rectangle on top of whatever is already drawn on canvas. Remember I mentioned painting with a brush earlier? In order to “move” it, we'd need to first erase previously drawn content, and then draw rectangle at a new location.
var canvasEl = document.getElementById('c');

...
ctx.strokRect(100, 100, 20, 20);
...

// erase entire canvas area
ctx.clearRect(0, 0, canvasEl.width, canvasEl.height);
ctx.fillRect(20, 50, 20, 20);
And how would we accomplish this with Fabric?
var canvas = new fabric.Canvas('c');
...
canvas.add(rect);
...

rect.set({ left: 20, top: 50 });
canvas.renderAll();
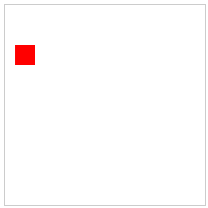 Notice a very important difference. With Fabric, we no longer need to erase the content before attempting to “modify” any content. We still work with objects, simply changing their properties, and then re-render canvas to get a “fresh picture”.
fillRect(left, top, width, height). Want to draw a line? Use a combination of moveTo(left, top) and lineTo(x, y). It's as if we're painting canvas with a brush, layering more and more oil on top, with very little control.45. With native methods however, things become much more “fun”. Remember that we can't operate on objects. Instead, we tweak positioning and angle of entire canvas bitmap (ctx.translate, ctx.rotate) to suit our needs. We then draw rectangle again, but remembering to offset bitmap properly (-10, -10), so that it's still rendered at the point of 100,100. As a bonus exercise, we had to translate degrees to radians when rotating canvas bitmap.fillRect on a canvas bitmap?fillRect command actually draws rectangle on top of whatever is already drawn on canvas. Remember I mentioned painting with a brush earlier? In order to “move” it, we'd need to first erase previously drawn content, and then draw rectangle at a new location.Objects
We already saw how to work with rectangles by instantiating fabric.Rect constructor. But of course Fabric covers all the other basic shapes as well — circles, triangles, ellipses, and so on. All of them are exposed under fabric “namespace” as fabric.Circle, fabric.Triangle, fabric.Ellipse, etc.
7 basic shapes provided in Fabric:
Want to draw a circle? Just create a circle object, and add it to canvas. Same with any other basic shape:
var circle = new fabric.Circle({
  radius: 20, fill: 'green', left: 100, top: 100
});
var triangle = new fabric.Triangle({
  width: 20, height: 30, fill: 'blue', left: 50, top: 50
});

canvas.add(circle, triangle);
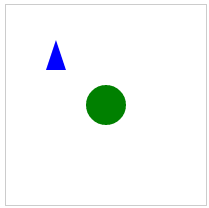 ..and there we have a green circle, drawn at 100,100 location and a blue triangle at 50,50 location.
fabric.Rect constructor. But of course Fabric covers all the other basic shapes as well — circles, triangles, ellipses, and so on. All of them are exposed under fabric “namespace” as fabric.Circle, fabric.Triangle, fabric.Ellipse, etc.Manipulating objects
Creating graphic objects — rectangles, circles, or something else — is certainly only the beginning. At some point, we will probably want to modify those objects. Perhaps certain action will need to trigger change of state, or play animation of some sort. Or we might want to change object properties (color, opacity, size, position) on certain mouse interactions.
Fabric takes care of canvas rendering and state management for us. We only need to modify objects themselves.
Earlier example demonstrated set method and how calling set({ left: 20, top: 50 }) “moved” object from previous location. In a similar fashion, we can change any other property of an object. But what are those properties?
Well, as you would expect there are those related to positioning — left, top; dimension — width, height; rendering — fill, opacity, stroke, strokeWidth; scaling and rotation — scaleX, scaleY, angle; and even those related to flipping — flipX, flipY and skewing skewX, skewY
Yes, creating flipped object in Fabric is as easy as setting flip* property to true.
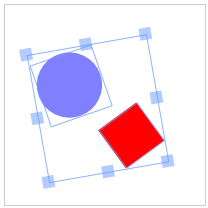
You can read any of these properties via get method, and set them via set. Let's try changing some of the red rectangle's properties:
var canvas = new fabric.Canvas('c');
...
canvas.add(rect);

rect.set('fill', 'red');
rect.set({ strokeWidth: 5, stroke: 'rgba(100,200,200,0.5)' });
rect.set('angle', 15).set('flipY', true);
 First, we're setting “fill” value to “red”, essentially making object of red color. The next statement sets both “strokeWidth” and “stroke” values, giving rectangle a 5px stroke of pale green color. Finally, we're changing “angle” and “flipY” properties. Notice how each of the 3 statements used slightly different syntax.
This demonstrates that
First, we're setting “fill” value to “red”, essentially making object of red color. The next statement sets both “strokeWidth” and “stroke” values, giving rectangle a 5px stroke of pale green color. Finally, we're changing “angle” and “flipY” properties. Notice how each of the 3 statements used slightly different syntax.
This demonstrates that set is a universal method. You will probably use it quite often, and so it's meant to be as convenient as possible.
We've covered setters, and what about getters? Quite obviously, there's generic get method but also a number of specific get* ones. To read “width” value of an object, you would use get('width') or getWidth(). To get a “scaleX” value — get('scaleX') or getScaleX(), and so on. There's a method like getWidth or getScaleX for each of the “public” object properties (“stroke”, “strokeWidth”, “angle”, etc.)
You might notice that in earlier examples objects were created with the same configuration hash as the one we just used in set method. That's because it is exactly the same. You can either “configure” object at the time of creation, or use set method after:
var rect = new fabric.Rect({ width: 10, height: 20, fill: '#f55', opacity: 0.7 });

// or functionally identical

var rect = new fabric.Rect();
rect.set({ width: 10, height: 20, fill: '#f55', opacity: 0.7 });
set method and how calling set({ left: 20, top: 50 }) “moved” object from previous location. In a similar fashion, we can change any other property of an object. But what are those properties?true.get method, and set them via set. Let's try changing some of the red rectangle's properties:set is a universal method. You will probably use it quite often, and so it's meant to be as convenient as possible.get method but also a number of specific get* ones. To read “width” value of an object, you would use get('width') or getWidth(). To get a “scaleX” value — get('scaleX') or getScaleX(), and so on. There's a method like getWidth or getScaleX for each of the “public” object properties (“stroke”, “strokeWidth”, “angle”, etc.)set method. That's because it is exactly the same. You can either “configure” object at the time of creation, or use set method after:Default options
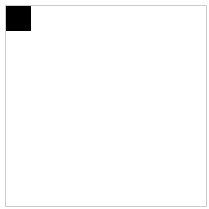
At this point, you might ask — what happens when we create an object without passing any “configuration” object. Does it still have those properties?
Yes, of course. Objects in Fabric always have a default set of properties. When omited during creation, it is this default set of properties that's “given” to object. We can try and see for ourselves:
var rect = new fabric.Rect(); // notice no options passed in

rect.get('width'); // 0
rect.get('height'); // 0

rect.get('left'); // 0
rect.get('top'); // 0

rect.get('fill'); // rgb(0,0,0)
rect.get('stroke'); // null

rect.get('opacity'); // 1
Our rectangle got a default set of properties. It's positioned at 0,0, is of black color, fully opaque, has no stroke and no dimensions (width and height are 0). Because of no dimensions, we can't see it on canvas. But giving it any positive values for width/height would certainly reveal a black rectangle at the left/top corner of canvas.
Hierarchy and Inheritance
Fabric objects do not just exist independent of each other. They form a very precise hierarchy.
Most of the objects inherit from a root fabric.Object. fabric.Object pretty much represents a 2-dimensional shape, positioned in 2-dimensional canvas plane. It's an entity that has left/top and width/height properties, as well as a slew of other graphic characteristics. Those properties that we saw on objects — fill, stroke, angle, opacity, flip*, etc. — are common to all Fabric objects that inherit from fabric.Object.
This inheritance allows us to define methods on fabric.Object and share them among all child “classes”. For example, if you wanted to have getAngleInRadians method on all objects, you would simply create it on fabric.Object.prototype:
fabric.Object.prototype.getAngleInRadians = function() {
  return this.get('angle') / 180 * Math.PI;
};

var rect = new fabric.Rect({ angle: 45 });
rect.getAngleInRadians(); // 0.785...

var circle = new fabric.Circle({ angle: 30, radius: 10 });
circle.getAngleInRadians(); // 0.523...

circle instanceof fabric.Circle; // true
circle instanceof fabric.Object; // true
As you can see, method immediately becomes available on all instances.
While child “classes” inherit from fabric.Object, they often also define their own methods and properties. For example, fabric.Circle needs to have “radius” property. And fabric.Image — which we'll look at in a moment — needs to have getElement/setElement methods for accessing/setting HTML <img> element from which image instance originates.
Working with prototypes to obtain custom rendering and behaviour is very common for advanced projects.
fabric.Object. fabric.Object pretty much represents a 2-dimensional shape, positioned in 2-dimensional canvas plane. It's an entity that has left/top and width/height properties, as well as a slew of other graphic characteristics. Those properties that we saw on objects — fill, stroke, angle, opacity, flip*, etc. — are common to all Fabric objects that inherit from fabric.Object.fabric.Object and share them among all child “classes”. For example, if you wanted to have getAngleInRadians method on all objects, you would simply create it on fabric.Object.prototype:fabric.Object, they often also define their own methods and properties. For example, fabric.Circle needs to have “radius” property. And fabric.Image — which we'll look at in a moment — needs to have getElement/setElement methods for accessing/setting HTML <img> element from which image instance originates.Working with prototypes to obtain custom rendering and behaviour is very common for advanced projects.
Canvas
Now that we covered objects in more detail, let's get back to canvas.
First thing you can see in all of Fabric examples if creation of canvas object — new fabric.Canvas('...'). fabric.Canvas serves as a wrapper around <canvas> element, and is responsible for managing all of the fabric objects on that particular canvas. It takes an id of an element, and returns an instance of fabric.Canvas.
We can add objects onto it, reference them off of it, or remove them:
var canvas = new fabric.Canvas('c');
var rect = new fabric.Rect();

canvas.add(rect); // add object

canvas.item(0); // reference fabric.Rect added earlier (first object)
canvas.getObjects(); // get all objects on canvas (rect will be first and only)

canvas.remove(rect); // remove previously-added fabric.Rect
While managing objects is the main purpose of fabric.Canvas, it also serves as a configuration host. Need to set background color or image for an entire canvas? Clip all contents to a certain area? Set different width/height? Specify whether canvas is interactive or not? All of these options (and others) can be set on fabric.Canvas, either at the time of creation or after:
var canvas = new fabric.Canvas('c', {
  backgroundColor: 'rgb(100,100,200)',
  selectionColor: 'blue',
  selectionLineWidth: 2
  // ...
});

// or

var canvas = new fabric.Canvas('c');
canvas.setBackgroundImage('http://...');
canvas.onFpsUpdate = function(){ /* ... */ };
// ...
new fabric.Canvas('...'). fabric.Canvas serves as a wrapper around <canvas> element, and is responsible for managing all of the fabric objects on that particular canvas. It takes an id of an element, and returns an instance of fabric.Canvas.add objects onto it, reference them off of it, or remove them:fabric.Canvas, it also serves as a configuration host. Need to set background color or image for an entire canvas? Clip all contents to a certain area? Set different width/height? Specify whether canvas is interactive or not? All of these options (and others) can be set on fabric.Canvas, either at the time of creation or after:Interactivity
While we're on a subject of canvas element, let's talk about interactivity. One of the unique features of Fabric — that's built right in — is a layer of interactivity on top of all that convenient object model we just looked at.
Object model exists to allow programmatic access and manipulation of objects on canvas. But on the outside, on a user level, there's a way to manipulate those objects via mouse (or touch, on touch devices). As soon as you initialize canvas via new fabric.Canvas('...'), it's possible to select objects, drag them around, scale or rotate them, and even group together to manipulate in one chunk!
 If we wanted user to allow dragging something on canvas — let's say an image — all we'd need to do is initialize canvas and add an object on it. No additional configuration or setup required.
To control this interactivity, we could use Fabric's “selection” boolean property on canvas in combination of “selectable” boolean property of individual objects.
If we wanted user to allow dragging something on canvas — let's say an image — all we'd need to do is initialize canvas and add an object on it. No additional configuration or setup required.
To control this interactivity, we could use Fabric's “selection” boolean property on canvas in combination of “selectable” boolean property of individual objects.
var canvas = new fabric.Canvas('c');
...
canvas.selection = false; // disable group selection
rect.set('selectable', false); // make object unselectable
But what if you don't want such interactivity layer at all? If that's the case, you can always substitute fabric.Canvas with fabric.StaticCanvas. The syntax for initialization is absolutely identical; you only use StaticCanvas instead of Canvas.
var staticCanvas = new fabric.StaticCanvas('c');

staticCanvas.add(
  new fabric.Rect({
    width: 10, height: 20,
    left: 100, top: 100,
    fill: 'yellow',
    angle: 30
  }));
This creates a “lighter” version of canvas, without any event handling logic. Note that you still have an entire object model to work with — adding objects, removing or modifying them, as well as changing any of the canvas configuration — all of this still works. It's only event handling that's gone.
Later, when we go over custom build option, you'll see that if StaticCanvas is all you need, you can even create a lighter version of Fabric. This could be a nice option, if you need something like non-interactive charts, or non-interactive images with filters in your application.
new fabric.Canvas('...'), it's possible to select objects, drag them around, scale or rotate them, and even group together to manipulate in one chunk! fabric.Canvas with fabric.StaticCanvas. The syntax for initialization is absolutely identical; you only use StaticCanvas instead of Canvas.StaticCanvas is all you need, you can even create a lighter version of Fabric. This could be a nice option, if you need something like non-interactive charts, or non-interactive images with filters in your application.Images
Speaking of images…
Adding rectangles and circles on canvas is fun but why don't we play with some images? As you would imagine by now, Fabric makes this easy. Let's instantiate fabric.Image object and add it to canvas:
(html)
<canvas id="c"></canvas>
<img src="my_image.png" id="my-image">
(js)
var canvas = new fabric.Canvas('c');
var imgElement = document.getElementById('my-image');
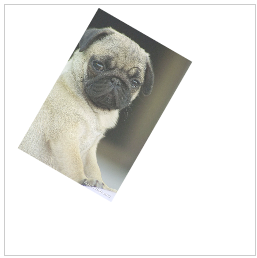
var imgInstance = new fabric.Image(imgElement, {
left: 100,
top: 100,
angle: 30,
opacity: 0.85
});
canvas.add(imgInstance);
Notice how we pass an image element to fabric.Image constructor. This creates an instance of fabric.Image that looks just like the image from the document. Moreover, we immediately set left/top values to 100/100, angle to 30, and opacity to 0.85. Once added to canvas, an image is rendered at 100,100 location, 30 degree angle, and is slightly transparent! Not bad.
 Now, what if we don't really have an image in a document, but only a URL of an image? Not a problem. Let's see how to use
 fabric.Image.fromURL:
fabric.Image.fromURL('my_image.png', function(oImg) {
  canvas.add(oImg);
});
Looks pretty straightforward, doesn't it? Just call fabric.Image.fromURL with a URL of an image, and give it a callback to invoke once image is loaded and created. The callback function receives already-created fabric.Image object as a first argument. At that point, you can add it to canvas or perhaps change first, and then add to canvas:
fabric.Image.fromURL('my_image.png', function(oImg) {
  // scale image down, and flip it, before adding it onto canvas
  oImg.scale(0.5).set('flipX, true);
  canvas.add(oImg);
});
fabric.Image object and add it to canvas:fabric.Image constructor. This creates an instance of fabric.Image that looks just like the image from the document. Moreover, we immediately set left/top values to 100/100, angle to 30, and opacity to 0.85. Once added to canvas, an image is rendered at 100,100 location, 30 degree angle, and is slightly transparent! Not bad.fabric.Image.fromURL:fabric.Image.fromURL with a URL of an image, and give it a callback to invoke once image is loaded and created. The callback function receives already-created fabric.Image object as a first argument. At that point, you can add it to canvas or perhaps change first, and then add to canvas:Paths
We've looked at simple shapes, then images. What about even more complex, rich shapes and content?
Meet the power couple — Path and Gropus.
Paths in Fabric represent an outline of a shape which can be filled, stroked, and modified in other ways. Paths consist of a series of commands, that essentially mimic a pen going from one point to another. With the help of such commands as “move”, “line”, “curve”, or “arc”, paths can form incredibly complex shapes. And with the help of groups of Paths (PathGroup's), the possibilities open up even more.
Paths in Fabric closely resemble SVG <path> elements. They use the same set of commands, they can be created from <path> elements, and serialized into them. We'll look more closely into serialization and SVG parsing later, but for now it's worth mentioning that you will likely rarely create Path instances by hand. Instead, you'll be using Fabric's built-in SVG parser. But to understand what Path objects are, let's try creating a simple one by hand:
var canvas = new fabric.Canvas('c');
var path = new fabric.Path('M 0 0 L 200 100 L 170 200 z');
path.set({ left: 120, top: 120 });
canvas.add(path);
 We're instantiation
 fabric.Path object, passing it a string of path instructions. While it looks cryptic, it's actually easy to understand. “M” represents “move” command, and tells that invisible pen to move to 0, 0 point. “L” stands for “line” and makes pen draw a line to 200, 100 point. Then, another “L” creates a line to 170, 200. Lastly, “z” tells forces drawing pen to close current path and finalize the shape. As a result, we get a triangular shape.
Since fabric.Path is just like any other object in Fabric, we were also able to change some of its properties. But we can modify it even more:
...
var path = new fabric.Path('M 0 0 L 300 100 L 200 300 z');
...
path.set({ fill: 'red', stroke: 'green', opacity: 0.5 });
canvas.add(path);
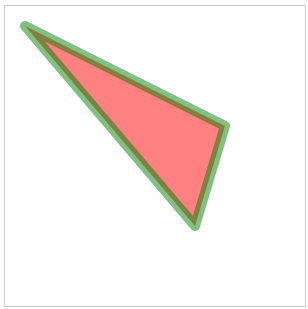 Out of curiosity, let's take a look at a slightly more complex path syntax. You'll see why creating paths by hand might not be the best idea.
...
var path = new fabric.Path('M121.32,0L44.58,0C36.67,0,29.5,3.22,24.31,8.41\
c-5.19,5.19-8.41,12.37-8.41,20.28c0,15.82,12.87,28.69,28.69,28.69c0,0,4.4,\
0,7.48,0C36.66,72.78,8.4,101.04,8.4,101.04C2.98,106.45,0,113.66,0,121.32\
c0,7.66,2.98,14.87,8.4,20.29l0,0c5.42,5.42,12.62,8.4,20.28,8.4c7.66,0,14.87\
-2.98,20.29-8.4c0,0,28.26-28.25,43.66-43.66c0,3.08,0,7.48,0,7.48c0,15.82,\
12.87,28.69,28.69,28.69c7.66,0,14.87-2.99,20.29-8.4c5.42-5.42,8.4-12.62,8.4\
-20.28l0-76.74c0-7.66-2.98-14.87-8.4-20.29C136.19,2.98,128.98,0,121.32,0z');

canvas.add(path.set({ left: 100, top: 200 }));
Oh boy, what's going on here?
Well, “M” still stands for “move” command, so the pen starts its drawing journey at “121.32, 0” point. Then there's “L” command that brings it to “44.58, 0”. So far so good. What's next? “C” command, which stands for “cubic bezier”. It makes the pen draw bezier curve from current point to “36.67, 0” one. It uses “29.5, 3.22” as control point at the beginning of a line, and “24.31, 8.41” as the control point at the end of the line. This whole thing is then followed by a dozen of other cubic bezier commands, which finally create a nice-looking shape of an arrow.
 Chances are, you won't be working with such “beasts” directly. Instead, you might want to use something like
 fabric.loadSVGFromString or fabric.loadSVGFromURL methods to load entire SVG file, and let Fabric's SVG parser do its job of walking over all SVG elements and creating corresponding Path objects.
Speaking of entire SVG documents, while Fabric's Path usually represent SVG <path> elements, a collection of paths that are often present in SVG documents, are represented as Groups (fabric.Group instances). As you can imagine, Group is nothing but a group of Paths and other objects. And since fabric.Group inherits from fabric.Object, it can be added to canvas just like any other object, and manipulated the very same way.
Just like with Paths, you probably won't be working with them directly. But if you stumble upon one after parsing SVG document, you'll know exactly what it is and which purpose it serves.
fabric.Path object, passing it a string of path instructions. While it looks cryptic, it's actually easy to understand. “M” represents “move” command, and tells that invisible pen to move to 0, 0 point. “L” stands for “line” and makes pen draw a line to 200, 100 point. Then, another “L” creates a line to 170, 200. Lastly, “z” tells forces drawing pen to close current path and finalize the shape. As a result, we get a triangular shape.fabric.Path is just like any other object in Fabric, we were also able to change some of its properties. But we can modify it even more:fabric.loadSVGFromString or fabric.loadSVGFromURL methods to load entire SVG file, and let Fabric's SVG parser do its job of walking over all SVG elements and creating corresponding Path objects.fabric.Group instances). As you can imagine, Group is nothing but a group of Paths and other objects. And since fabric.Group inherits from fabric.Object, it can be added to canvas just like any other object, and manipulated the very same way.Afterword
We've only scratched the surface of what's possible with Fabric. You can now easily create any of the simple shapes, complex shapes, images; add them to canvas, and modify in any way you want — positions, dimensions, angles, colors, strokes, opacity — you name it.
In the next parts of this series, we'll take a look at working with groups; animation; text; SVG parsing, rendering, serialization; events; image filters; and more.
Meanwhile, feel free to take at look at the annotated demos or benchmarks, join the discussion in google group or elsewhere, or go straight for the docs, wiki, and source.
Have fun experimenting with Fabric! I hope you enjoy the ride.
Read Part 2.
Today I'd like to introduce you to Fabric.js — a powerful Javascript library that makes working with HTML5 canvas a breeze. Fabric provides a missing object model for canvas, as well as an SVG parser, layer of interactivity, and a whole suite of other indispensable tools. It is a fully open-source project, licensed under MIT, with many contributions over the years.
I started developing Fabric 3 years ago, after discovering the pains of working with native canvas API. I was creating an interactive design editor for printio.ru — my startup that allows users to design their own apparel. The kind of interactivity we wanted only existed in Flash apps in those days. Even right now, very few come close to what became possible with Fabric.
Let's take a closer look!
Why fabric?
Canvas allows us to create some absolutely amazing graphics on the web these days. But the API it provides is disappointingly low-level. It's one thing if we simply want to draw few basic shapes on canvas and forget about them. But as soon as there's need for any kind of interaction, change of picture at any point, or drawing of more complex shapes — situtation changes dramatically.
Fabric aims to solve this problem.
Native canvas methods only allow us to fire off simple graphic commands, blindly modifying entire canvas bitmap. Want to draw a rectangle? Use
fillRect(left, top, width, height). Want to draw a line? Use a combination of moveTo(left, top) and lineTo(x, y). It's as if we're painting canvas with a brush, layering more and more oil on top, with very little control.
Instead of operating on such low level, Fabric provides simple but powerful object model on top of native methods. It takes care of canvas state and rendering, and lets us work with “objects” directly.
Let's take a look at a simple example demonstrating this difference. Let's say we want to draw a red rectangle somewhere on canvas. Here's how we would do this with native <canvas> API.
// reference canvas element (with id="c")
var canvasEl = document.getElementById('c');

// get 2d context to draw on (the "bitmap" mentioned earlier)
var ctx = canvasEl.getContext('2d');

// set fill color of context
ctx.fillStyle = 'red';

// create rectangle at a 100,100 point, with 20x20 dimensions
ctx.fillRect(100, 100, 20, 20);
Now, let's take a look at doing the same with Fabric:
// create a wrapper around native canvas element (with id="c")
var canvas = new fabric.Canvas('c');

// create a rectangle object
var rect = new fabric.Rect({
  left: 100,
  top: 100,
  fill: 'red',
  width: 20,
  height: 20
});

// "add" rectangle onto canvas
canvas.add(rect);
At this point, there's almost no difference in size — the two examples are pretty similar. However, you can already see how different the approach to working with canvas is. With native methods, we operate on context — an object representing entire canvas bitmap. In Fabric, we operate on objects — instantiate them, change their properties, and add them to canvas. You can see that these objects are first-class citizens in Fabric land.
But rendering plain red rectangle is just so boring. We could have at least made something fun with it! Perhaps, rotate slightly?
Let's try 45 degrees. First, using native <canvas> methods:
var canvasEl = document.getElementById('c');
var ctx = canvasEl.getContext('2d');
ctx.fillStyle = 'red';

ctx.translate(100, 100);
ctx.rotate(Math.PI / 180 * 45);
ctx.fillRect(-10, -10, 20, 20);
and now using Fabric:
var canvas = new fabric.Canvas('c');

// create a rectangle with angle=45
var rect = new fabric.Rect({
  left: 100,
  top: 100,
  fill: 'red',
  width: 20,
  height: 20,
  angle: 45
});

canvas.add(rect);
What happened here?
All we had to do in Fabric is change object's “angle” value to
45. With native methods however, things become much more “fun”. Remember that we can't operate on objects. Instead, we tweak positioning and angle of entire canvas bitmap (ctx.translate, ctx.rotate) to suit our needs. We then draw rectangle again, but remembering to offset bitmap properly (-10, -10), so that it's still rendered at the point of 100,100. As a bonus exercise, we had to translate degrees to radians when rotating canvas bitmap.
I'm sure you're starting to see exactly why Fabric exists and how much low-level boilerplate it hides.
But let's take a look at yet another example — keeping track of canvas state.
What if at some point, we wanted to move that now-familiar red rectangle to a slightly different location on canvas? How would we do this without being able to operate on objects? Would we just call another
fillRect on a canvas bitmap?
Not quite. Calling another
fillRect command actually draws rectangle on top of whatever is already drawn on canvas. Remember I mentioned painting with a brush earlier? In order to “move” it, we'd need to first erase previously drawn content, and then draw rectangle at a new location.var canvasEl = document.getElementById('c');
...
ctx.strokRect(100, 100, 20, 20);
...
// erase entire canvas area
ctx.clearRect(0, 0, canvasEl.width, canvasEl.height);
ctx.fillRect(20, 50, 20, 20);
And how would we accomplish this with Fabric?
var canvas = new fabric.Canvas('c');
...
canvas.add(rect);
...

rect.set({ left: 20, top: 50 });
canvas.renderAll();
Notice a very important difference. With Fabric, we no longer need to erase the content before attempting to “modify” any content. We still work with objects, simply changing their properties, and then re-render canvas to get a “fresh picture”.
Objects
We already saw how to work with rectangles by instantiating
fabric.Rect constructor. But of course Fabric covers all the other basic shapes as well — circles, triangles, ellipses, and so on. All of them are exposed under fabric “namespace” as fabric.Circle, fabric.Triangle, fabric.Ellipse, etc.
7 basic shapes provided in Fabric:
Want to draw a circle? Just create a circle object, and add it to canvas. Same with any other basic shape:
var circle = new fabric.Circle({
  radius: 20, fill: 'green', left: 100, top: 100
});
var triangle = new fabric.Triangle({
  width: 20, height: 30, fill: 'blue', left: 50, top: 50
});

canvas.add(circle, triangle);
..and there we have a green circle, drawn at 100,100 location and a blue triangle at 50,50 location.
Manipulating objects
Creating graphic objects — rectangles, circles, or something else — is certainly only the beginning. At some point, we will probably want to modify those objects. Perhaps certain action will need to trigger change of state, or play animation of some sort. Or we might want to change object properties (color, opacity, size, position) on certain mouse interactions.
Fabric takes care of canvas rendering and state management for us. We only need to modify objects themselves.
Earlier example demonstrated
set method and how calling set({ left: 20, top: 50 }) “moved” object from previous location. In a similar fashion, we can change any other property of an object. But what are those properties?
Well, as you would expect there are those related to positioning — left, top; dimension — width, height; rendering — fill, opacity, stroke, strokeWidth; scaling and rotation — scaleX, scaleY, angle; and even those related to flipping — flipX, flipY and skewing skewX, skewY
Yes, creating flipped object in Fabric is as easy as setting flip* property to
true.
You can read any of these properties via
get method, and set them via set. Let's try changing some of the red rectangle's properties:var canvas = new fabric.Canvas('c');
...
canvas.add(rect);
rect.set('fill', 'red');
rect.set({ strokeWidth: 5, stroke: 'rgba(100,200,200,0.5)' });
rect.set('angle', 15).set('flipY', true);
First, we're setting “fill” value to “red”, essentially making object of red color. The next statement sets both “strokeWidth” and “stroke” values, giving rectangle a 5px stroke of pale green color. Finally, we're changing “angle” and “flipY” properties. Notice how each of the 3 statements used slightly different syntax.
This demonstrates that
set is a universal method. You will probably use it quite often, and so it's meant to be as convenient as possible.
We've covered setters, and what about getters? Quite obviously, there's generic
get method but also a number of specific get* ones. To read “width” value of an object, you would use get('width') or getWidth(). To get a “scaleX” value — get('scaleX') or getScaleX(), and so on. There's a method like getWidth or getScaleX for each of the “public” object properties (“stroke”, “strokeWidth”, “angle”, etc.)
You might notice that in earlier examples objects were created with the same configuration hash as the one we just used in
set method. That's because it is exactly the same. You can either “configure” object at the time of creation, or use set method after:var rect = new fabric.Rect({ width: 10, height: 20, fill: '#f55', opacity: 0.7 });
// or functionally identical
var rect = new fabric.Rect();
rect.set({ width: 10, height: 20, fill: '#f55', opacity: 0.7 });
Default options
At this point, you might ask — what happens when we create an object without passing any “configuration” object. Does it still have those properties?
Yes, of course. Objects in Fabric always have a default set of properties. When omited during creation, it is this default set of properties that's “given” to object. We can try and see for ourselves:
var rect = new fabric.Rect(); // notice no options passed in

rect.get('width'); // 0
rect.get('height'); // 0

rect.get('left'); // 0
rect.get('top'); // 0

rect.get('fill'); // rgb(0,0,0)
rect.get('stroke'); // null

rect.get('opacity'); // 1
Our rectangle got a default set of properties. It's positioned at 0,0, is of black color, fully opaque, has no stroke and no dimensions (width and height are 0). Because of no dimensions, we can't see it on canvas. But giving it any positive values for width/height would certainly reveal a black rectangle at the left/top corner of canvas.
Hierarchy and Inheritance
Fabric objects do not just exist independent of each other. They form a very precise hierarchy.
Most of the objects inherit from a root
fabric.Object. fabric.Object pretty much represents a 2-dimensional shape, positioned in 2-dimensional canvas plane. It's an entity that has left/top and width/height properties, as well as a slew of other graphic characteristics. Those properties that we saw on objects — fill, stroke, angle, opacity, flip*, etc. — are common to all Fabric objects that inherit from fabric.Object.
This inheritance allows us to define methods on
fabric.Object and share them among all child “classes”. For example, if you wanted to have getAngleInRadians method on all objects, you would simply create it on fabric.Object.prototype:fabric.Object.prototype.getAngleInRadians = function() {
return this.get('angle') / 180 * Math.PI;
};
var rect = new fabric.Rect({ angle: 45 });
rect.getAngleInRadians(); // 0.785...
var circle = new fabric.Circle({ angle: 30, radius: 10 });
circle.getAngleInRadians(); // 0.523...
circle instanceof fabric.Circle; // true
circle instanceof fabric.Object; // true
As you can see, method immediately becomes available on all instances.
While child “classes” inherit from
Working with prototypes to obtain custom rendering and behaviour is very common for advanced projects.
fabric.Object, they often also define their own methods and properties. For example, fabric.Circle needs to have “radius” property. And fabric.Image — which we'll look at in a moment — needs to have getElement/setElement methods for accessing/setting HTML <img> element from which image instance originates.Working with prototypes to obtain custom rendering and behaviour is very common for advanced projects.
Canvas
Now that we covered objects in more detail, let's get back to canvas.
First thing you can see in all of Fabric examples if creation of canvas object —
new fabric.Canvas('...'). fabric.Canvas serves as a wrapper around <canvas> element, and is responsible for managing all of the fabric objects on that particular canvas. It takes an id of an element, and returns an instance of fabric.Canvas.
We can
add objects onto it, reference them off of it, or remove them:var canvas = new fabric.Canvas('c');
var rect = new fabric.Rect();
canvas.add(rect); // add object
canvas.item(0); // reference fabric.Rect added earlier (first object)
canvas.getObjects(); // get all objects on canvas (rect will be first and only)
canvas.remove(rect); // remove previously-added fabric.Rect
While managing objects is the main purpose of
fabric.Canvas, it also serves as a configuration host. Need to set background color or image for an entire canvas? Clip all contents to a certain area? Set different width/height? Specify whether canvas is interactive or not? All of these options (and others) can be set on fabric.Canvas, either at the time of creation or after:var canvas = new fabric.Canvas('c', {
backgroundColor: 'rgb(100,100,200)',
selectionColor: 'blue',
selectionLineWidth: 2
// ...
});
// or
var canvas = new fabric.Canvas('c');
canvas.setBackgroundImage('http://...');
canvas.onFpsUpdate = function(){ /* ... */ };
// ...
Interactivity
While we're on a subject of canvas element, let's talk about interactivity. One of the unique features of Fabric — that's built right in — is a layer of interactivity on top of all that convenient object model we just looked at.
Object model exists to allow programmatic access and manipulation of objects on canvas. But on the outside, on a user level, there's a way to manipulate those objects via mouse (or touch, on touch devices). As soon as you initialize canvas via
new fabric.Canvas('...'), it's possible to select objects, drag them around, scale or rotate them, and even group together to manipulate in one chunk!
If we wanted user to allow dragging something on canvas — let's say an image — all we'd need to do is initialize canvas and add an object on it. No additional configuration or setup required.
To control this interactivity, we could use Fabric's “selection” boolean property on canvas in combination of “selectable” boolean property of individual objects.
var canvas = new fabric.Canvas('c');
...
canvas.selection = false; // disable group selection
rect.set('selectable', false); // make object unselectable
But what if you don't want such interactivity layer at all? If that's the case, you can always substitute
fabric.Canvas with fabric.StaticCanvas. The syntax for initialization is absolutely identical; you only use StaticCanvas instead of Canvas.var staticCanvas = new fabric.StaticCanvas('c');
staticCanvas.add(
new fabric.Rect({
width: 10, height: 20,
left: 100, top: 100,
fill: 'yellow',
angle: 30
}));
This creates a “lighter” version of canvas, without any event handling logic. Note that you still have an entire object model to work with — adding objects, removing or modifying them, as well as changing any of the canvas configuration — all of this still works. It's only event handling that's gone.
Later, when we go over custom build option, you'll see that if
StaticCanvas is all you need, you can even create a lighter version of Fabric. This could be a nice option, if you need something like non-interactive charts, or non-interactive images with filters in your application.Images
Speaking of images…
Adding rectangles and circles on canvas is fun but why don't we play with some images? As you would imagine by now, Fabric makes this easy. Let's instantiate
fabric.Image object and add it to canvas:
(html)
<canvas id="c"></canvas>
<img src="my_image.png" id="my-image">
(js)
var canvas = new fabric.Canvas('c');
var imgElement = document.getElementById('my-image');
var imgInstance = new fabric.Image(imgElement, {
  left: 100,
  top: 100,
  angle: 30,
  opacity: 0.85
});
canvas.add(imgInstance);
Notice how we pass an image element to
fabric.Image constructor. This creates an instance of fabric.Image that looks just like the image from the document. Moreover, we immediately set left/top values to 100/100, angle to 30, and opacity to 0.85. Once added to canvas, an image is rendered at 100,100 location, 30 degree angle, and is slightly transparent! Not bad.
Now, what if we don't really have an image in a document, but only a URL of an image? Not a problem. Let's see how to use
fabric.Image.fromURL:fabric.Image.fromURL('my_image.png', function(oImg) {
canvas.add(oImg);
});
Looks pretty straightforward, doesn't it? Just call
fabric.Image.fromURL with a URL of an image, and give it a callback to invoke once image is loaded and created. The callback function receives already-created fabric.Image object as a first argument. At that point, you can add it to canvas or perhaps change first, and then add to canvas:fabric.Image.fromURL('my_image.png', function(oImg) {
// scale image down, and flip it, before adding it onto canvas
oImg.scale(0.5).set('flipX, true);
canvas.add(oImg);
});
Paths
We've looked at simple shapes, then images. What about even more complex, rich shapes and content?
Meet the power couple — Path and Gropus.
Paths in Fabric represent an outline of a shape which can be filled, stroked, and modified in other ways. Paths consist of a series of commands, that essentially mimic a pen going from one point to another. With the help of such commands as “move”, “line”, “curve”, or “arc”, paths can form incredibly complex shapes. And with the help of groups of Paths (PathGroup's), the possibilities open up even more.
Paths in Fabric closely resemble SVG <path> elements. They use the same set of commands, they can be created from <path> elements, and serialized into them. We'll look more closely into serialization and SVG parsing later, but for now it's worth mentioning that you will likely rarely create Path instances by hand. Instead, you'll be using Fabric's built-in SVG parser. But to understand what Path objects are, let's try creating a simple one by hand:
var canvas = new fabric.Canvas('c');
var path = new fabric.Path('M 0 0 L 200 100 L 170 200 z');
path.set({ left: 120, top: 120 });
canvas.add(path);
We're instantiation
fabric.Path object, passing it a string of path instructions. While it looks cryptic, it's actually easy to understand. “M” represents “move” command, and tells that invisible pen to move to 0, 0 point. “L” stands for “line” and makes pen draw a line to 200, 100 point. Then, another “L” creates a line to 170, 200. Lastly, “z” tells forces drawing pen to close current path and finalize the shape. As a result, we get a triangular shape.
Since
fabric.Path is just like any other object in Fabric, we were also able to change some of its properties. But we can modify it even more:...
var path = new fabric.Path('M 0 0 L 300 100 L 200 300 z');
...
path.set({ fill: 'red', stroke: 'green', opacity: 0.5 });
canvas.add(path);
Out of curiosity, let's take a look at a slightly more complex path syntax. You'll see why creating paths by hand might not be the best idea.
...
var path = new fabric.Path('M121.32,0L44.58,0C36.67,0,29.5,3.22,24.31,8.41\
c-5.19,5.19-8.41,12.37-8.41,20.28c0,15.82,12.87,28.69,28.69,28.69c0,0,4.4,\
0,7.48,0C36.66,72.78,8.4,101.04,8.4,101.04C2.98,106.45,0,113.66,0,121.32\
c0,7.66,2.98,14.87,8.4,20.29l0,0c5.42,5.42,12.62,8.4,20.28,8.4c7.66,0,14.87\
-2.98,20.29-8.4c0,0,28.26-28.25,43.66-43.66c0,3.08,0,7.48,0,7.48c0,15.82,\
12.87,28.69,28.69,28.69c7.66,0,14.87-2.99,20.29-8.4c5.42-5.42,8.4-12.62,8.4\
-20.28l0-76.74c0-7.66-2.98-14.87-8.4-20.29C136.19,2.98,128.98,0,121.32,0z');

canvas.add(path.set({ left: 100, top: 200 }));
Oh boy, what's going on here?
Well, “M” still stands for “move” command, so the pen starts its drawing journey at “121.32, 0” point. Then there's “L” command that brings it to “44.58, 0”. So far so good. What's next? “C” command, which stands for “cubic bezier”. It makes the pen draw bezier curve from current point to “36.67, 0” one. It uses “29.5, 3.22” as control point at the beginning of a line, and “24.31, 8.41” as the control point at the end of the line. This whole thing is then followed by a dozen of other cubic bezier commands, which finally create a nice-looking shape of an arrow.
Chances are, you won't be working with such “beasts” directly. Instead, you might want to use something like
fabric.loadSVGFromString or fabric.loadSVGFromURL methods to load entire SVG file, and let Fabric's SVG parser do its job of walking over all SVG elements and creating corresponding Path objects.
Speaking of entire SVG documents, while Fabric's Path usually represent SVG <path> elements, a collection of paths that are often present in SVG documents, are represented as Groups (
fabric.Group instances). As you can imagine, Group is nothing but a group of Paths and other objects. And since fabric.Group inherits from fabric.Object, it can be added to canvas just like any other object, and manipulated the very same way.
Just like with Paths, you probably won't be working with them directly. But if you stumble upon one after parsing SVG document, you'll know exactly what it is and which purpose it serves.
Afterword
We've only scratched the surface of what's possible with Fabric. You can now easily create any of the simple shapes, complex shapes, images; add them to canvas, and modify in any way you want — positions, dimensions, angles, colors, strokes, opacity — you name it.
In the next parts of this series, we'll take a look at working with groups; animation; text; SVG parsing, rendering, serialization; events; image filters; and more.
Meanwhile, feel free to take at look at the annotated demos or benchmarks, join the discussion in google group or elsewhere, or go straight for the docs, wiki, and source.
Have fun experimenting with Fabric! I hope you enjoy the ride.
Read Part 2.Introduction to Fabric.js. Part 2.
In the first part of this series, we only started to get familiar with Fabric.js. We looked at the reasons to use Fabric, at its object model and object hierarchy, at different kind of entities available in Fabric — simple shapes, images, and complex paths. We also learned how to perform simple operations with Fabric objects on canvas.
Now that most of the basics are out of the way, let's get down to some fun stuff!
Animation
No respectable canvas library goes without animation facility. And Fabric is not an exception. Since there's such a powerful object model and graphical capabilities, it would be a shame not to have animation helpers built in.
Remember how easy it was to change property of any object? We just called
set method, passing corresponding value(s):rect.set('angle', 45);
Well, animating an object is just as easy. Every Fabric object has
animate method which... animates that object.rect.animate('angle', 45, {
onChange: canvas.renderAll.bind(canvas)
});
First argument is the property to animate. Second argument is the ending value of animation. If rectangle has -15° angle, and we pass 45, it will be animated from -15° to 45°. The third argument is an optional object specifying finer details of animation — duration, callbacks, easing, etc.
One convenient feature of
animate is that it also supports relative values. For example, if you wanted to animate object's left property by 100px, you could do it like this:rect.animate('left', '+=100', { onChange: canvas.renderAll.bind(canvas) });
Similarly, rotating object by 5 degrees counter-clockwise, can be accomplished like so:
rect.animate('angle', '-=5', { onChange: canvas.renderAll.bind(canvas) });
You might be wondering why we always specify "onChange" callback there. Isn't third argument optional? It is, but calling
canvas.renderAll on each animation frame is what allows us to see actual animation! You see, when we call animate method, it only animates property value over time, following specific algorithm (i.e. easing). So rect.animate('angle', 45) will change object's angle but won't re-render canvas screen after each change of the angle. And we obviously need this re-rendering in order to see the actual animation.
Remember that there's entire object model underneath that canvas surface. Objects have their own properties and relations, and canvas is only responsible for projecting their existence to the outside world.
The reason
animate doesn't automatically re-render canvas after each change is due to performance. After all, we can have hundreds or thousands animating objects on canvas, and it wouldn't be good if every one of them tried to re-render screen. In the case of many objects, you could use something like requestAnimationFrame (or other timer-based) loop to render canvas continuosly on its own, without calling renderAllfor each object. But most of the time, you'll probably need to explicitly specify canvas.renderAll as "onChange" callback.
So which other options can we pass to animate?
- from: Allows to specify starting value of animatable property (if we don't want current value to be used).
- duration: Defaults to 500 (ms). Can be used to change duration of an animation.
- onComplete: Callback that's invoked at the end of the animation.
- easing: Easing function.
All of these options should be self-explanatory, except perhaps easing one. Let's take a closer look.
By default,
animate uses "easeInSine" function for animation. If that's not what you need, there's a whole slew of easing options available under fabric.util.ease. For example, if we wanted to move object to the right in a bouncy fashion:rect.animate('left', 500, {
onChange: canvas.renderAll.bind(canvas),
duration: 1000,
easing: fabric.util.ease.easeOutBounce
});
Notice
fabric.util.ease.easeOutBounce as an easing option. Other notable ones include easeInCubic, easeOutCubic, easeInElastic, easeOutElastic, easeInBounce, and easeOutExpo.
So this covers animation part of Fabric. Just to give you some ideas of what becomes possible — you can animate object's angle to make it rotate; animate left/top properties to make it move; animate width/height to make it shrink/grow; animate opacity to make it fade in/out; and so on.
Image filters
In the first part of this series, we learned how to work with images in Fabric. There's
fabric.Image constructor, that accepts image element. There's also fabric.Image.fromURL method, which can create image instance ouf of a URL string. And any of these images can be thrown and rendered on canvas just like any other object.
But as fun working with images as it is, it's even cooler to apply image filters to them!
Fabric provides few filters by default, both for WEBGL enabled browsers and not. It also makes it easy to define your own. Some of the built-in ones you might be very well familiar with — filter to remove white background, grayscale filter, invert or brightness ones. Others might be a little less popular — colormatrix, sepia, or noise.
So how do we apply filters to images in Fabric? Well, every instance of
fabric.Image has "filters" property which is a simple array of filters. Each of the filters in that array is an instance of one of Fabric filters. Or an instance of your own custom filter.
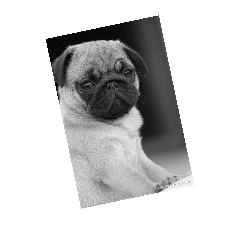
So let's create a grayscale image.
fabric.Image.fromURL('pug.jpg', function(img) {

  // add filter
  img.filters.push(new fabric.Image.filters.Grayscale());

  // apply filters and re-render canvas when done
  img.applyFilters();
  // add image onto canvas (it also re-render the canvas)
  canvas.add(img);
});
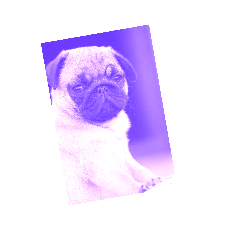
How about a sepia version of an image?
fabric.Image.fromURL('pug.jpg', function(img) {
  img.filters.push(new fabric.Image.filters.Sepia());
  img.applyFilters();
  // add image onto canvas (it also re-render the canvas)
  canvas.add(img);
});
Since "filters" property is a simple array, we can perform any desired operations with it in a usual way — remove filter (via
pop, splice, or shift), add filter (via push, splice, unshift), or even combine multiple filters. Any filters present in "filters" array will be applied one by one, when we call applyFilters. So let's try to create an image that's both sepia and bright.fabric.Image.fromURL('pug.jpg', function(img) {
img.filters.push(
new fabric.Image.filters.Sepia(),
new fabric.Image.filters.Brightness({ brightness: 100 }));
img.applyFilters();
canvas.add(img);
});
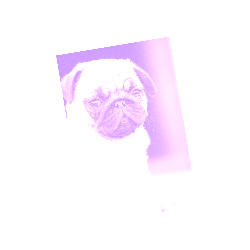
Notice that we also passed
{ brightness: 100 } object to Brightness filter. That's because some filters can be applied without any additional configuration (e.g. grayscale, invert, sepia) and others provide finer control for their behavior. For brightness filter, it's the actual brightness level (-1 full black to 1 full white). For noise filter, it's the noise value (0-1000). For "remove color" filter, it's the threshold and distance values. And so on.
So now that you became familiar with Fabric filters, it's time to break out of the box and create your own filter!
The template for creating a filter is pretty straightforward. We'll need to create a "class", then define
applyTo method. Optionally, we might give filter toJSON method (support for JSON serialization), and/or initialize method (support for optional parameters).fabric.Image.filters.Redify = fabric.util.createClass(fabric.Image.filters.BaseFilter, {
type: 'Redify',
/**
* Fragment source for the redify program
*/
fragmentSource: 'precision highp float;\n' +
'uniform sampler2D uTexture;\n' +
'varying vec2 vTexCoord;\n' +
'void main() {\n' +
'vec4 color = texture2D(uTexture, vTexCoord);\n' +
'color.g = 0;\n' +
'color.b = 0;\n' +
'gl_FragColor = color;\n' +
'}',
applyTo2d: function(options) {
var imageData = options.imageData,
data = imageData.data, i, len = data.length;
for (i = 0; i < len; i += 4) {
data[i + 1] = 0;
data[i + 2] = 0;
}
}
});
fabric.Image.filters.Redify.fromObject = fabric.Image.filters.BaseFilter.fromObject;

Without delving too much into this code, the main action is hapenning in a loop. where we replace green (data[i+1]) and blue (data[i+2]) components of each pixel with 0, essentialy removing them. Red component of standard rgb triple stays untouched, essentially making entire image painted red. As you can see,
applyTo method is being passed an option object that contains the imageData of the image at that stage of the filtering pipeline. From there, we can iterate over its pixels (getImageData().data) modifying them in any way we want. If the browsers is WEBGL enabled filters can run on the GPU. To do so you have to provide a fragment shader that describes the operation to do over pixels. There are many filter defined in fabric where you can see example of how to write a fragment or vertex shaderColors
Whether you're more comfortable working with hex, RGB, or RGBA colors, Fabric provides a solid color foundation to help you express yourself most naturally. Here are some of the ways in which you can define a color in Fabric:
new fabric.Color('#f55');
new fabric.Color('#123123');
new fabric.Color('356735');
new fabric.Color('rgb(100,0,100)');
new fabric.Color('rgba(10, 20, 30, 0.5)');
Conversion is straightforward as well.
toHex() will convert color instance to hex representation. toRgb() — to RGB one, and toRgba() — to RGB with alpha channel.new fabric.Color('#f55').toRgb(); // "rgb(255,85,85)"
new fabric.Color('rgb(100,100,100)').toHex(); // "646464"
new fabric.Color('fff').toHex(); // "FFFFFF"
Conversion is not the only thing you can do with colors. You can also overlay one color with another, or turn it to grayscale version.
var redish = new fabric.Color('#f55');
var greenish = new fabric.Color('#5f5');

redish.overlayWith(greenish).toHex(); // "AAAA55"
redish.toGrayscale().toHex(); // "A1A1A1"
Gradients
An even more expressive way to work with colors is via gradients. Gradients allow us to blend one color into another, creating some stunning graphical effects.
Fabric supports gradients via
setGradient method, defined on all objects. Calling setGradient('fill', { ... }) is just like setting "fill" value of an object, except that we fill object with gradient, rather than single color.var circle = new fabric.Circle({
left: 100,
top: 100,
radius: 50
});
circle.setGradient('fill', {
x1: 0,
y1: 0,
x2: 0,
y2: circle.height,
colorStops: {
0: '#000',
1: '#fff'
}
});
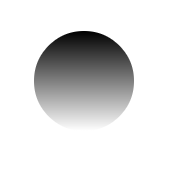
In the above example, we create a circle at 100,100 location, with 50px radius. We then set its fill to a gradient that spans throughout entire height of that circle, from black to white.
The argument passed to a method is an options object, which expects 2 coordinate pairs (x1, y1 and x2, y2), as well as "colorStops" object. Coordinates specify where gradient starts and where it ends. colorStops specify which colors a gradient is made of. You can define as many color stops as you want, as long as they range from 0 to 1 (e.g. 0, 0.1, 0.3, 0.5, 0.75, 1). 0 represents beginning of a gradient, 1 — its end.
Coordinates are relative to object top left corner, so the highest point of the circle is
0, and the lowest point is circle.height. setGradientcalculates width coordinates (x1, x2) in the same way.
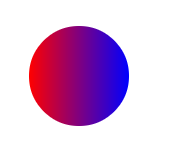
Here's an example of left-to-right red-blue gradient:
circle.setGradient('fill', {
  x1: 0,
  y1: 0,
  x2: circle.width,
  y2: 0,
  colorStops: {
    0: "red",
    1: "blue"
  }
});
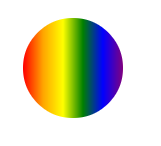
And here's a 5-stops rainbow gradient, with colors spanning at even 20% intervals:
circle.setGradient('fill', {
  x1: 0,
  y1: 0,
  x2: circle.width,
  y2: 0,
  colorStops: {
    0: "red",
    0.2: "orange",
    0.4: "yellow",
    0.6: "green",
    0.8: "blue",
    1: "purple"
  }
});
Which cool versions can you come up with?
Text
What if you wanted to display not only images and vector shapes on canvas, but also text? Fabric has you covered! Meet
fabric.Text objects.
There are 2 reasons we're providing text abstraction in Fabric. First, is to allow working with text in an object oriented fashion. Native canvas methods — as usual — only allow to fill or stroke text on a very low level. By instantiating
fabric.Text instances, we can work with text just like we would work with any other Fabric object — move it, scale it, change its properties, and so on.
Second reason is to provide a much richer functionality than what canvas gives us. Some of the Fabric additions include:
- Multiline support Native text methods unfortunately simply ignore new lines.
- Text alignment Left, center, right. Useful when working with multiline text.
- Text background Background also respects text alignment.
- Text decoration Underline, overline, strike-through.
- Line height Useful when working with multiline text.
- Char spacing Makes text more compact or more spaced
- Subranges apply colors and properties to subranges of your text object
- Multibyte support emoticons!
- On canvas editing with the interactive class you can type text directly over the canvas
How about hello world example?
var text = new fabric.Text('hello world', { left: 100, top: 100 });
canvas.add(text);
That's right! Displaying text on canvas is as simple as adding
fabric.Text instance at a desired location. As you can see, the only required first parameter is actual text string. Second argument is the usual options object, which can have any of the usual left, top, fill, opacity, etc. properties.
But of course text objects also have their own, unique, text-related properties. Let's look at some of them:
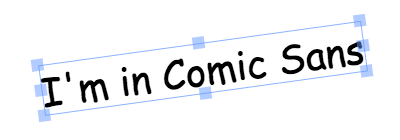
fontFamily
Set as "Times New Roman" by default, this property allow us to change font family used to render a text object. Changing it will immediately make text rendered in a new font.
var comicSansText = new fabric.Text("I'm in Comic Sans", {
  fontFamily: 'Comic Sans'
});
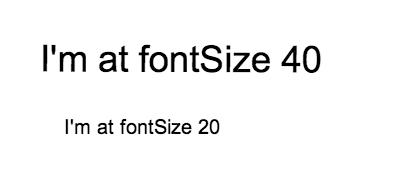
fontSize
Font size controls the size of rendered text. Note that unlike with other objects in Fabric, you can't change text's width/height properties directly. Instead, you'll need to change "fontSize" value in order to make text objects larger or smaller. Either that, or you can always use scaleX/scaleY properties.
var text40 = new fabric.Text("I'm at fontSize 40", {
  fontSize: 40
});
var text20 = new fabric.Text("I'm at fontSize 20", {
  fontSize: 20
});
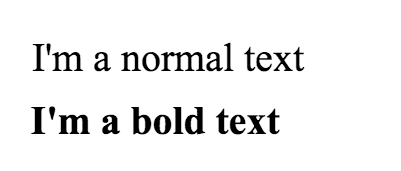
fontWeight
Font weight allows to make text thicker or thinner -looking. Just like in CSS, you can use either keywords ("normal", "bold") or numbers (100, 200, 400, 600, 800). Note that whether you can use certain weight depends on availability of that weight for a chosen font. If you're using remote font, you'll need to make sure you provide both normal and bold (as well as any other required weight) font definitions.
var normalText = new fabric.Text("I'm a normal text", {
  fontWeight: 'normal'
});
var boldText = new fabric.Text("I'm at bold text", {
  fontWeight: 'bold'
});
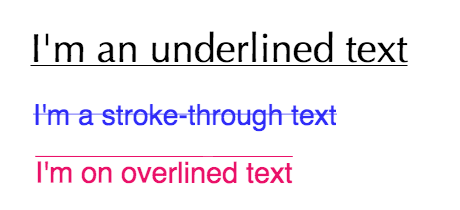
textDecoration
Text decoration allows to add undeline, overline, or strike-through to a text. This is similar to CSS, but Fabric goes a little further and allows to use any combination of the above together. So you can have a text that's both underline and overline, or underline and strike-through, and so on.
var underlineText = new fabric.Text("I'm an underlined text", {
  underline; true
});
var strokeThroughText = new fabric.Text("I'm a stroke-through text", {
  linethrough: true
});
var overlineText = new fabric.Text("I'm an overline text", {
  overline: true
});
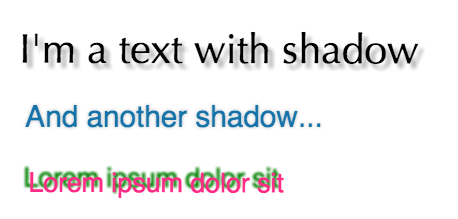
shadow
This property was called "textShadow" before version 1.3.0
Text shadow consists of 4 components: color, horizontal offset, vertical offset, and blur size. This might look very familiar if you've worked with shadows in CSS. Lots of combinations possible by changing these values.
var shadowText1 = new fabric.Text("I'm a text with shadow", {
  shadow: 'rgba(0,0,0,0.3) 5px 5px 5px'
});
var shadowText2 = new fabric.Text("And another shadow", {
  shadow: 'rgba(0,0,0,0.2) 0 0 5px'
});
var shadowText3 = new fabric.Text("Lorem ipsum dolor sit", {
  shadow: 'green -5px -5px 3px'
});
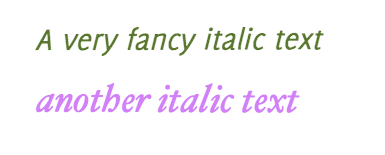
fontStyle
Font style can be one of 2 values: normal or italic. This is similar to same-named CSS property.
var italicText = new fabric.Text("A very fancy italic text", {
  fontStyle: 'italic',
  fontFamily: 'Delicious'
});
var anotherItalicText = new fabric.Text("another italic text", {
  fontStyle: 'italic',
  fontFamily: 'Hoefler Text'
});
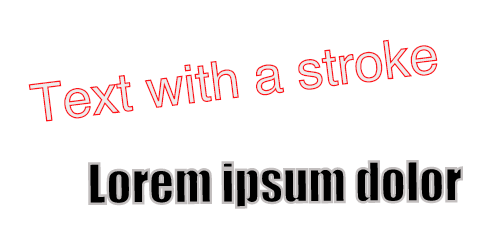
stroke and strokeWidth
By combining stroke (color of the stroke) and strokeWidth (its width), you can achieve some interesting effects on your text. Here's a couple of examples:
var textWithStroke = new fabric.Text("Text with a stroke", {
  stroke: '#ff1318',
  strokeWidth: 1
});
var loremIpsumDolor = new fabric.Text("Lorem ipsum dolor", {
  fontFamily: 'Impact',
  stroke: '#c3bfbf',
  strokeWidth: 3
});
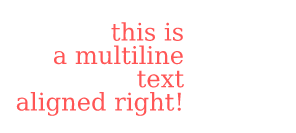
textAlign
Text align comes useful when working with multiline text. With one-line text, the width of bounding box is always exactly matching that line's width, so there's nothing to align.
Allowed values are "left", "center", and "right".
var text = 'this is\na multiline\ntext\naligned right!';
var alignedRightText = new fabric.Text(text, {
  textAlign: 'right'
});
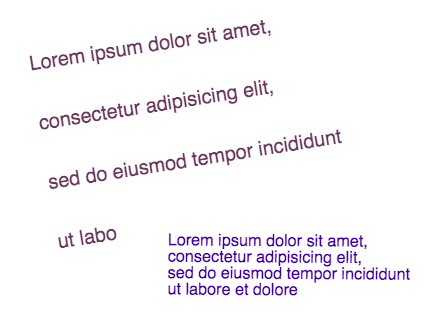
lineHeight
Another property that might be familiar from CSS-land is lineHeight. It allows us to change vertical spacing between text lines in multiline text. In the following example, first chunk of text has lineHeight of 3, and second one — 1.
var lineHeight3 = new fabric.Text('Lorem ipsum ...', {
  lineHeight: 3
});
var lineHeight1 = new fabric.Text('Lorem ipsum ...', {
  lineHeight: 1
});
textBackgroundColor
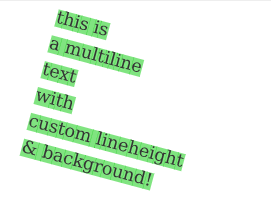
Finally, textBackgroundColor is what allows to give text a background. Note that background fills only space occupied by text characters, not the entire bounding box. It means that text alignment changes the way text background is rendered. So does line height, since background respects this vertical space between lines, created by lineHeight.
var text = 'this is\na multiline\ntext\nwith\ncustom lineheight\n&background';
var textWithBackground = new fabric.Text(text, {
  textBackgroundColor: 'rgb(0,200,0)'
});
Events
The event-driven architecture is the basis for some amazing power and flexibility within a framework. Fabric is no exception, and provides an extensive event system, starting from low-level "mouse" events to high-level objects ones.
These events allow us to tap into different moments of various actions happening on canvas. Want to know when the mouse was pressed? Just observe "mouse:down" event. How about when object was added to canvas? "object:added" is there for you. And what about when the entire canvas is re-rendered? Just use "after:render".
The event API is very simple and resembles that of jQuery, Underscore.js, or other popular JS libraries. There's
on method to initialize event listener, and off to remove it.
Let's take a look at an actual example:
var canvas = new fabric.Canvas('...');
canvas.on('mouse:down', function(options) {
  console.log(options.e.clientX, options.e.clientY);
});
We're adding event "mouse:down" event listener onto canvas, and giving it an event handler that will log coordinates of where the event originated. In other words, it'll log where exactly on canvas the mouse was pressed. The event handler receives an options object, which has 2 properties:
e — the original event, and target — a clicked object on canvas, if any. The event is present at all times, but target only exists if you actually did click on some object on canvas. The target is also only passed to handlers of events where it makes sense. For example, for "mouse:down" but not for "after:render" (which denotes that entire canvas was re-drawn).canvas.on('mouse:down', function(options) {
if (options.target) {
console.log('an object was clicked! ', options.target.type);
}
});
The above example will log "an object was clicked!" if you click an object. It will also show the type of object clicked.
So which other events are available in Fabric? Well, from mouse-level ones there are "mouse:down", "mouse:move", and "mouse:up". From generic ones, there are "after:render". Then there are selection-related events: "before:selection:cleared", "selection:created", "selection:cleared". And finally, object ones: "object:modified", "object:selected", "object:moving", "object:scaling", "object:rotating", "object:added", and "object:removed"
Note that events like "object:moving" (or "object:scaling") are fired continuously every time an object is moved (or scaled) even by one pixel. On the other hand, events like "object:modified" or "selection:created" are fired only at the end of the action (object modification or selection creation).
Note how we attached events right onto canvas (
canvas.on('mouse:down', ...)). As you can imagine, this means that events are all scoped to canvas instances. If you have multiple canvases on a page, you can attach different event listeners to each one of them. They're all independent and respect only events that were assigned to them.
For convenience, Fabric takes event system even further, and allows you to attach listeners directly to canvas objects. Let's take a look:
var rect = new fabric.Rect({ width: 100, height: 50, fill: 'green' });
rect.on('selected', function() {
  console.log('selected a rectangle');
});

var circle = new fabric.Circle({ radius: 75, fill: 'blue' });
circle.on('selected', function() {
  console.log('selected a circle');
});
We're attaching event listeners directly to rectangle and circle instances. Instead of "object:selected", we're using "selected" event. Similarly, we could have used "modified" event ("object:modified" when attaching to canvas), "rotating" event ("object:rotating" when attaching to canvas), and so on.
Check this events demo for a more extensive exploration of Fabric's event system.
Read Part 3.
Introduction to Fabric.js. Part 3.
We've covered most of the basics in first and second parts of this series. Let's move on to the more advanced stuf!
Groups
First thing we'll talk about is groups. Groups are one of Fabric's most powerful features. They are exactly what they sound like — a simple way to group any Fabric objects into a single entity. Why would we want to do this? To be able to work with those objects as a single unit, of course!
Remember how any number of Fabric objects on canvas can be grouped with the mouse, forming a single selection? Once grouped, the objects can all be moved and even modified together. They form a group. We can scale that group, rotate, and even change its presentational properties — color, transparency, borders, etc.
This is exactly what groups are for, and every time you see a selection like this on canvas, Fabric creates a group of objects implicitly, behind the scenes. It only makes sense to provide access to working with groups programmatically. This is what
fabric.Group is for.
Let's create a group of 2 objects, circle and text:
var circle = new fabric.Circle({
  radius: 100,
  fill: '#eef',
  scaleY: 0.5,
  originX: 'center',
  originY: 'center'
});

var text = new fabric.Text('hello world', {
  fontSize: 30,
  originX: 'center',
  originY: 'center'
});

var group = new fabric.Group([ circle, text ], {
  left: 150,
  top: 100,
  angle: -10
});

canvas.add(group);
First, we created a "hello world" text object. Setting
originX and originY to 'center' will cause it to be centered within the group; by default group members are oriented relative to the top-left corner of the group. Then, circle with 100px radius, filled with "#eef" color and squeezed vertically (scaleY=0.5). We then created a fabric.Group instance, passing it array with these two objects, and giving it position of 150/100 and a -10 angle. Finally, the group was added to canvas as any other object would be (with canvas.add()).
And voila! You see an object on canvas, that looks like a labeled ellipse. Notice how in order to modify that object, we simply changed properties of a group, giving it custom left, top and angle values. You can now work with this object as a single entity.
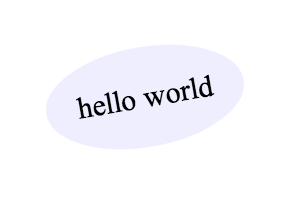
Now that we have a group on canvas, let's change it up a little:
group.item(0).setFill('red');
group.item(1).set({
  text: 'trololo',
  fill: 'white'
});
What's going on here? We're accessing individual objects in a group via
item() method, and modifying their properties. First object is the squeezed circle, second one is the text. Let's see what happens: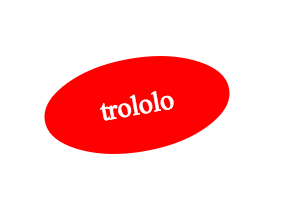
One important thing you've probably noticed by now is that objects in group are all positioned relative to the center of a group. When we changed text of text object, it stayed centered even after changing its width. If you don't want this behavior, you need to specify objects' left/top coordinates. In that case, they will be grouped together according to those coordinates.
Let's create and group 3 circles so they're positioned horizontally one after each other:
var circle1 = new fabric.Circle({
  radius: 50,
  fill: 'red',
  left: 0
});
var circle2 = new fabric.Circle({
  radius: 50,
  fill: 'green',
  left: 100
});
var circle3 = new fabric.Circle({
  radius: 50,
  fill: 'blue',
  left: 200
});

var group = new fabric.Group([ circle1, circle2, circle3 ], {
  left: 200,
  top: 100
});

canvas.add(group);
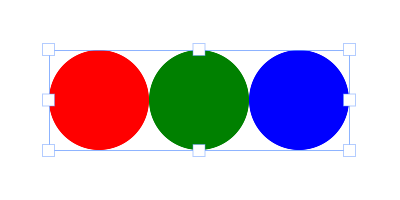
Another thing to keep in mind when working with groups is the state of objects. For example, when forming a group with images, you need to make sure those images are fully loaded. Since Fabric already provides helper methods for ensuring that image is loaded, this becomes fairly easy:
fabric.Image.fromURL('/assets/pug.jpg', function(img) {
  var img1 = img.scale(0.1).set({ left: 100, top: 100 });

  fabric.Image.fromURL('/assets/pug.jpg', function(img) {
    var img2 = img.scale(0.1).set({ left: 175, top: 175 });

    fabric.Image.fromURL('/assets/pug.jpg', function(img) {
      var img3 = img.scale(0.1).set({ left: 250, top: 250 });

      canvas.add(new fabric.Group([ img1, img2, img3], { left: 200, top: 200 }))
    });
  });
});
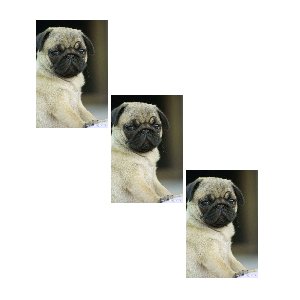
So which other methods are available when working with groups? There's
getObjects() method, which works exactly the same as fabric.Canvas#getObjects() and returns an array of all objects in a group. There's size() which represents the number of all objects in a group. There's contains() which allows to check if a particular object is in a group. There's item(), which we saw earlier, allowing to retrieve specific object in a group. There's forEachObject(), once again mirroring fabric.Canvas#forEachObject, only in relation to group objects. Finally there's add() and remove() method to add and remove objects from the group accordingly.
You can add/remove objects from group in 2 ways — with update of group dimensions/position and without. We suggest to use the update dimensions, unless you are doing a batch operation and you have no problem with the group having wrong width/height during the process
To add rectangle at the center of a group:
group.add(new fabric.Rect({
  ...
  originX: 'center',
  originY: 'center'
}));
To add rectangle 100px off the center of the group:
group.add(new fabric.Rect({
  ...
  left: 100,
  top: 100,
  originX: 'center',
  originY: 'center'
}));
To add rectangle at the center of a group AND update group's dimensions:
group.addWithUpdate(new fabric.Rect({
  ...
  left: group.get('left'),
  top: group.get('top'),
  originX: 'center',
  originY: 'center'
}));
To add rectangle at 100px off the center of a group AND update group's dimensions:
group.addWithUpdate(new fabric.Rect({
  ...
  left: group.get('left') + 100,
  top: group.get('top') + 100,
  originX: 'center',
  originY: 'center'
}));
Finally, if you'd like to create a group with objects that are already present on canvas, you'll need to clone them first:
// create a group with copies of existing (2) objects
var group = new fabric.Group([
  canvas.item(0).clone(),
  canvas.item(1).clone()
]);

// remove all objects and re-render
canvas.clear().renderAll();

// add group onto canvas
canvas.add(group);
Serialization
As soon as you start building a stateful application of some sort, perhaps allowing users to save results of canvas contents on a server, or streaming contents to a different client, you'll need canvas serialization. How else are you to send canvas contents? Of course, there's always an option to export canvas to an image, but uploading an image to a server is certainly quite bandwidth-heavy. Nothing beats text when it comes to size, and that's exactly why Fabric provides an excellent support for canvas serialization/deserialization.
toObject, toJSON
The backbone of canvas serialization in Fabric is
fabric.Canvas#toObject() and fabric.Canvas#toJSON() methods. Let's take a look at a simple example, first serializing an empty canvas:var canvas = new fabric.Canvas('c');
JSON.stringify(canvas); // '{"objects":[],"background":"rgba(0, 0, 0, 0)"}'
We're using ES5
JSON.stringify() method, which implicitly calls toJSON method on passed object, if that method exists. Since canvas instance in Fabric has toJSON method, it's as if we called JSON.stringify(canvas.toJSON()) instead.
Notice the returned string that represents empty canvas. It's in JSON format, and essentially consists of "objects" and "background" properties. "objects" is currently empty, since there's nothing on canvas, and background has a default transparent value ("rgba(0, 0, 0, 0)").
Let's give canvas different background and see how things change:
canvas.backgroundColor = 'red';
JSON.stringify(canvas); // '{"objects":[],"background":"red"}'
As one would expect, canvas representation now reflects new background color. Now, let's add some objects!
canvas.add(new fabric.Rect({
  left: 50,
  top: 50,
  height: 20,
  width: 20,
  fill: 'green'
}));
console.log(JSON.stringify(canvas));
..and the logged output is:
'{"objects":[{"type":"rect","left":50,"top":50,"width":20,"height":20,"fill":"green","overlayFill":null,"stroke":null,"strokeWidth":1,"strokeDashArray":null,"scaleX":1,"scaleY":1,"angle":0,"flipX":false,"flipY":false,"opacity":1,"selectable":true,"hasControls":true,"hasBorders":true,"hasRotatingPoint":false,"transparentCorners":true,"perPixelTargetFind":false,"rx":0,"ry":0}],"background":"rgba(0, 0, 0, 0)"}'
Woah. At first sight quite a lot changed, but looking closer we see that it's newly-added object that's now part of "objects" array, serialized into JSON. Notice, how its representation includes all of its visual traits — left, top, width, height, fill, stroke, and so on.
If we were to add another object — say, a red circle positioned next to the rectangle, you would see that representation changed accordingly:
canvas.add(new fabric.Circle({
  left: 100,
  top: 100,
  radius: 50,
  fill: 'red'
}));
console.log(JSON.stringify(canvas));
..and the logged output is:
'{"objects":[{"type":"rect","left":50,"top":50,"width":20,"height":20,"fill":"green","overlayFill":null,"stroke":null,"strokeWidth":1,"strokeDashArray":null,"scaleX":1,"scaleY":1,"angle":0,"flipX":false,"flipY":false,"opacity":1,"selectable":true,"hasControls":true,"hasBorders":true,"hasRotatingPoint":false,"transparentCorners":true,"perPixelTargetFind":false,"rx":0,"ry":0},{"type":"circle","left":100,"top":100,"width":100,"height":100,"fill":"red","overlayFill":null,"stroke":null,"strokeWidth":1,"strokeDashArray":null,"scaleX":1,"scaleY":1,"angle":0,"flipX":false,"flipY":false,"opacity":1,"selectable":true,"hasControls":true,"hasBorders":true,"hasRotatingPoint":false,"transparentCorners":true,"perPixelTargetFind":false,"radius":50}],"background":"rgba(0, 0, 0, 0)"}'
I highlighted the
"type":"rect" and "type":"circle" parts, so that you can see better where those objects are. Even though it might seem like a lot of output at first, it is nothing comparing to what you would get with image serialization. Just for comparison, let's take a look at about 1/10th (!) of a string you would get with canvas.toDataURL('png')data:image/png;base64,iVBORw0KGgoAAAANSUhEUgAAAyAAAAK8CAYAAAAXo9vkAAAgAElEQVR4Xu3dP4xtBbnG4WPAQOQ2YBCLK1qpoQE1/m+NVlCDwUACicRCEuysrOwkwcJgAglEItRQaWz9HxEaolSKtxCJ0FwMRIj32zqFcjm8e868s2fNWo/Jygl+e397rWetk5xf5pyZd13wPwIECBAgQIAAAQIECBxI4F0H+hwfQ4AAAQIECBAgQIAAgQsCxENAgAABAgQIECBAgMDBBATIwah9EAECBAgQIECAAAECAsQzQIAAAQIECBAgQIDAwQQEyMGofRABAgQIECBAgAABAgLEM0CAAAECBAgQIECAwMEEBMjBqH0QAQIECBAgQIAAAQICxDNAgAABAgQIECBAgMDBBATIwah9EAECBAgQIECAAAECAsQzQIAAAQIECBAgQIDAwQQEyMGofRABAgQIECBAgAABAgLEM0CAAAECBAgQIECAwMEEBMjBqH0QAQIECBAgQIAAAQICxDNAgAABAgQIECBAgMDBBATIwah9EAECBAgQIECAAAECAsQzQIAAAQIECBAgQIDAwQQEyMGofRABAgQIECBAgAABAgLEM0CAAAECBAgQIECAwMEEBMjBqH0QAQIECBAgQIAAAQICxDNAgAABAgQIECBAgMDBBATIwah9EAECBAgQIECAAAECAsQzQIAAAQIECBAgQIDAwQQEyMGofRABAgQIECBAgAABAgLEM0CAAAECBAgQIECAwMEEBMjBqH0QAQIECBAgQIAAAQICxDNAgAABAgQIECBAgMDBBATIwah9EAECBAgQIECAAAECAsQzQIAAAQIECBAgQIDAwQQEyMGofRABAgQIECBAgAABAgLEM0CAAAECBAgQIECAwMEEBMjBqH0QAQIECBAgQIAAAQICxDNAgAABAgQIECBAgMDBBATIwah9EAECBAgQIECAAAECAsQzQIAAAQIECBAgQIDAwQQEyMGofRABAgQIECBAgAABAgLEM0CAAAECBAgQIECAwMEEBMjBqH0QAQIECBAgQIAAAQICxDNAgAABAgQIECBAgMDBBATIwah9EAECBAgQIECAAAECyw+Qb134R/U2fevC8q+5esGWESBAgAABAgQIEFiOwPL/MC5AlvO0OBMCBAgQIECAAAECJxQQICcE9HYCBAgQIECAAAECBPYXECD7W3klAQIECBAgQIAAAQInFBAgJwT0dgIECBAgQIAAAQIE9hcQIPtbeSUBAgQIECBAgAABAicUECAnBPR2AgQIECBAgAABAgT2FxAg+1t5JQECBAgQIECAAAECJxQQICcE9HYCBAgQIECAAAECBPYXECD7W3klAQIECBAgQIAAAQInFBAgJwTc9+3z49yvmNd+dI7PzPHJOW6Y4wNzXD3HlXNc9pZdb85/vzbHK3P8aY7n5vj1HL+Y43dz417f97O9jgABAgQIECBAgMBSBATIKd2JCY5dWNwyx5fn+PwcV5U/6tXZ99M5fjjHk3Mjd6HifwQIECBAgAABAgQWLSBAirdnouP6WXfvHHfOcU1x9T6rXp4XPTLHA3NTX9jnDV5DgAABAgQIECBA4NACAuSE4hMdl8+Kr83xzTmuO+G61ttfnEXfnuN7c4PfaC21hwABAgQIECBAgMBJBQTIJQpOeFw7b71/jtsvccWh3vbYfNB9c6NfOtQH+hwCBAgQIECAAAECFxMQIMd8No7C4+F5283HfOtZv/ypOYG7hMhZ3wafT4AAAQIECBDYtoAA2fP+H/1Vqwd3f4jf8y1Lfdkunu7xV7OWenucFwECBAgQIEBg3QICZI/7O/Fxx7xs9wf3t36r3D3evciX7L7F7+6rIY8u8uycFAECBAgQIE
...and ~17000 characters more.
You might be wondering why there's also
fabric.Canvas#toObject. Quite simply, toObject returns the same representation as toJSON, only in a form of actual object, without string serialization. For example, taking earlier example of canvas with just a green rectangle, `canvas.toObject()`'s output is this:{ "background" : "rgba(0, 0, 0, 0)",
"objects" : [
{
"angle" : 0,
"fill" : "green",
"flipX" : false,
"flipY" : false,
"hasBorders" : true,
"hasControls" : true,
"hasRotatingPoint" : false,
"height" : 20,
"left" : 50,
"opacity" : 1,
"overlayFill" : null,
"perPixelTargetFind" : false,
"scaleX" : 1,
"scaleY" : 1,
"selectable" : true,
"stroke" : null,
"strokeDashArray" : null,
"strokeWidth" : 1,
"top" : 50,
"transparentCorners" : true,
"type" : "rect",
"width" : 20
}
]
}
As you can see,
toJSON output is essentially a stringified toObject output. Now, the interesting (and useful!) thing is that toObject output is smart and lazy. What you see inside "objects" array is the result of iterating over all canvas objects and delegating to their own toObjectmethod. fabric.Path has its own toObject — that knows to return path's "points" array, and fabric.Image has its own toObject — that knows to return image's "src" property. In a true object-oriented fashion, all objects are capable of serializing themselves.
This means that when you create your own "class", or simply need to customize object's serialized representation, all you need to do is work with
toObject method — either completely replacing it or extending it. Let's try this:var rect = new fabric.Rect();
rect.toObject = function() {
return { name: 'trololo' };
};
canvas.add(rect);
console.log(JSON.stringify(canvas));
..and the logged output is:
'{"objects":[{"name":"trololo"}],"background":"rgba(0, 0, 0, 0)"}'
As you can see, the objects array now has a custom representation of our rectangle. This kind of overwrite is probably not very useful — although brings the point across — so how about we instead extend rectangle's
toObject method with additional property.var rect = new fabric.Rect();
rect.toObject = (function(toObject) {
return function() {
return fabric.util.object.extend(toObject.call(this), {
name: this.name
});
};
})(rect.toObject);
canvas.add(rect);
rect.name = 'trololo';
console.log(JSON.stringify(canvas));
..and the logged output is:
'{"objects":[{"type":"rect","left":0,"top":0,"width":0,"height":0,"fill":"rgb(0,0,0)","overlayFill":null,"stroke":null,"strokeWidth":1,"strokeDashArray":null,"scaleX":1,"scaleY":1,"angle":0,"flipX":false,"flipY":false,"opacity":1,"selectable":true,"hasControls":true,"hasBorders":true,"hasRotatingPoint":false,"transparentCorners":true,"perPixelTargetFind":false,"rx":0,"ry":0,"name":"trololo"}],"background":"rgba(0, 0, 0, 0)"}'
We extended object's existing
toObject method with additional property — "name", so that property is now part of toObject output, and as a result appears in canvas JSON representation. One more thing worth mentioning is that if you extend objects like this, you'll also want to make sure object's "class" (fabric.Rect in this case) has this property in "stateProperties" array, so that loading canvas from string representation would parse and add it to an object correctly.
You can mark an object as non exportable setting
excludeFromExport to true. In this way some helper objects you can have on canvas will not be saved during your serialization.toSVG
Another efficient text-based canvas representation is in SVG format. Since Fabric specializes in SVG parsing and rendering on canvas, it only makes sense to make this a two-way process and provide canvas-to-SVG conversion. Let's add the same rectangle to canvas, and see what kind of representation is returned from
toSVG method:canvas.add(new fabric.Rect({
left: 50,
top: 50,
height: 20,
width: 20,
fill: 'green'
}));
console.log(canvas.toSVG());
..and the logged output is:
'<?xml version="1.0" standalone="no" ?><!DOCTYPE svg PUBLIC "-//W3C//DTD SVG 20010904//EN" "http://www.w3.org/TR/2001/REC-SVG-20010904/DTD/svg10.dtd"><svg xmlns="http://www.w3.org/2000/svg" xmlns:xlink="http://www.w3.org/1999/xlink" version="1.1" width="800" height="700" xml:space="preserve"><desc>Created with Fabric.js 0.9.21</desc><rect x="-10" y="-10" rx="0" ry="0" width="20" height="20" style="stroke: none; stroke-width: 1; stroke-dasharray: ; fill: green; opacity: 1;" transform="translate(50 50)" /></svg>'
Just like with
toJSON and toObject, toSVG — when called on canvas — delegates its logic to each individual object, and each individual object has its own toSVG method that is special to the type of object. If you ever need to modify or extend SVG representation of an object, you can do the same thing with toSVG as we've done with toObject.
The benefit of SVG representation comparing to Fabric's proprietary
toObject/toJSON is that you can throw it into any SVG-capable renderer (browser, application, printer, camera, etc.) and it should just work. With toObject/toJSON, however, you would first need to load it onto canvas. Speaking of loading things on canvas, now that we can serialize canvas into an efficient chunk of text, how would we go about loading back onto canvas?Deserialization, SVG parser
Similarly to serialization, there's two ways to load canvas from a string: from JSON representation, or from SVG one. When using JSON representation, there's
fabric.Canvas#loadFromJSON and fabric.Canvas#loadFromDatalessJSON methods. When using SVG, there's fabric.loadSVGFromURL and fabric.loadSVGFromString ones.
Notice that first 2 methods are instance ones, and are called on canvas instance directly, whereas last 2 methods are static ones and are called on "fabric" object rather than on canvas.
There's not much to say about these methods. They work exactly as you would expect them to. Let's take, for example, previous JSON output from canvas and load it on clean canvas:
var canvas = new fabric.Canvas();

canvas.loadFromJSON('{"objects":[{"type":"rect","left":50,"top":50,"width":20,"height":20,"fill":"green","overlayFill":null,"stroke":null,"strokeWidth":1,"strokeDashArray":null,"scaleX":1,"scaleY":1,"angle":0,"flipX":false,"flipY":false,"opacity":1,"selectable":true,"hasControls":true,"hasBorders":true,"hasRotatingPoint":false,"transparentCorners":true,"perPixelTargetFind":false,"rx":0,"ry":0},{"type":"circle","left":100,"top":100,"width":100,"height":100,"fill":"red","overlayFill":null,"stroke":null,"strokeWidth":1,"strokeDashArray":null,"scaleX":1,"scaleY":1,"angle":0,"flipX":false,"flipY":false,"opacity":1,"selectable":true,"hasControls":true,"hasBorders":true,"hasRotatingPoint":false,"transparentCorners":true,"perPixelTargetFind":false,"radius":50}],"background":"rgba(0, 0, 0, 0)"}');
..and both objects "magically" appear on canvas:
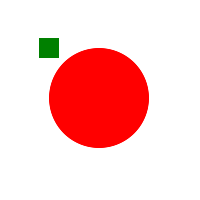
So loading canvas from string is pretty easy. But what about that strange-looking
loadFromDatalessJSON method? How exactly is it different from loadFromJSON that we just used? On order to understand why we need this method, we need to look at the serialized canvas that has a more-or-less complex path object. Like this one: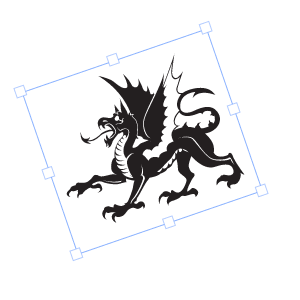
..and the
JSON.stringify(canvas) output for this shape is:{"objects":[{"type":"path","left":184,"top":177,"width":175,"height":151,"fill":"#231F20","overlayFill":null,"stroke":null,"strokeWidth":1,"strokeDashArray":null,"scaleX":1,"scaleY":1,"angle":-19,"flipX":false,"flipY":false,"opacity":1,"selectable":true,"hasControls":true,"hasBorders":true,"hasRotatingPoint":false,"transparentCorners":true,"perPixelTargetFind":false,"path":[["M",39.502,61.823],["c",-1.235,-0.902,-3.038,-3.605,-3.038,-3.605],["s",0.702,0.4,3.907,1.203],["c",3.205,0.8,7.444,-0.668,10.114,-1.97],["c",2.671,-1.302,7.11,-1.436,9.448,-1.336],["c",2.336,0.101,4.707,0.602,4.373,2.036],["c",-0.334,1.437,-5.742,3.94,-5.742,3.94],["s",0.4,0.334,1.236,0.334],["c",0.833,0,6.075,-1.403,6.542,-4.173],["s",-1.802,-8.377,-3.272,-9.013],["c",-1.468,-0.633,-4.172,0,-4.172,0],["c",4.039,1.438,4.941,6.176,4.941,6.176],["c",-2.604,-1.504,-9.279,-1.234,-12.619,0.501],["c",-3.337,1.736,-8.379,2.67,-10.083,2.503],["c",-1.701,-0.167,-3.571,-1.036,-3.571,-1.036],["c",1.837,0.034,3.239,-2.669,3.239,-2.669],["s",-2.068,2.269,-5.542,0.434],["c",-3.47,-1.837,-1.704,-8.18,-1.704,-8.18],["s",-2.937,5.909,-1,9.816],["C",34.496,60.688,39.502,61.823,39.502,61.823],["z"],["M",77.002,40.772],["c",0,0,-1.78,-5.03,-2.804,-8.546],["l",-1.557,8.411],["l",1.646,1.602],["c",0,0,0,-0.622,-0.668,-1.691],["C",72.952,39.48,76.513,40.371,77.002,40.772],["z"],["M",102.989,86.943],["M",102.396,86.424],["c",0.25,0.22,0.447,0.391,0.594,0.519],["C",102.796,86.774,102.571,86.578,102.396,86.424],["z"],["M",169.407,119.374],["c",-0.09,-5.429,-3.917,-3.914,-3.917,-2.402],["c",0,0,-11.396,1.603,-13.086,-6.677],["c",0,0,3.56,-5.43,1.69,-12.461],["c",-0.575,-2.163,-1.691,-5.337,-3.637,-8.605],["c",11.104,2.121,21.701,-5.08,19.038,-15.519],["c",-3.34,-13.087,-19.63,-9.481,-24.437,-9.349],["c",-4.809,0.135,-13.486,-2.002,-8.011,-11.618],["c",5.473,-9.613,18.024,-5.874,18.024,-5.874],["c",-2.136,0.668,-4.674,4.807,-4.674,4.807],["c",9.748,-6.811,22.301,4.541,22.301,4.541],["c",-3.097,-13.678,-23.153,-14.636,-30.041,-12.635],["c",-4.286,-0.377,-5.241,-3.391,-3.073,-6.637],["c",2.314,-3.473,10.503,-13.976,10.503,-13.976],["s",-2.048,2.046,-6.231,4.005],["c",-4.184,1.96,-6.321,-2.227,-4.362,-6.854],["c",1.96,-4.627,8.191,-16.559,8.191,-16.559],["c",-1.96,3.207,-24.571,31.247,-21.723,26.707],["c",2.85,-4.541,5.253,-11.93,5.253,-11.93],["c",-2.849,6.943,-22.434,25.283,-30.713,34.274],["s",-5.786,19.583,-4.005,21.987],["c",0.43,0.58,0.601,0.972,0.62,1.232],["c",-4.868,-3.052,-3.884,-13.936,-0.264,-19.66],["c",3.829,-6.053,18.427,-20.207,18.427,-20.207],["v",-1.336],["c",0,0,0.444,-1.513,-0.089,-0.444],["c",-0.535,1.068,-3.65,1.245,-3.384,-0.889],["c",0.268,-2.137,-0.356,-8.549,-0.356,-8.549],["s",-1.157,5.789,-2.758,5.61],["c",-1.603,-0.179,-2.493,-2.672,-2.405,-5.432],["c",0.089,-2.758,-1.157,-9.702,-1.157,-9.702],["c",-0.8,11.75,-8.277,8.011,-8.277,3.74],["c",0,-4.274,-4.541,-12.82,-4.541,-12.82],["s",2.403,14.421,-1.336,14.421],["c",-3.737,0,-6.944,-5.074,-9.879,-9.882],["C",78.161,5.874,68.279,0,68.279,0],["c",13.428,16.088,17.656,32.111,18.397,44.512],["c",-1.793,0.422,-2.908,2.224,-2.908,2.224],["c",0.356,-2.847,-0.624,-7.745,-1.245,-9.882],["c",-0.624,-2.137,-1.159,-9.168,-1.159,-9.168],["c",0,2.67,-0.979,5.253,-2.048,9.079],["c",-1.068,3.828,-0.801,6.054,-0.801,6.054],["c",-1.068,-2.227,-4.271,-2.137,-4.271,-2.137],["c",1.336,1.783,0.177,2.493,0.177,2.493],["s",0,0,-1.424,-1.601],["c",-1.424,-1.603,-3.473,-0.981,-3.384,0.265],["c",0.089,1.247,0,1.959,-2.849,1.959],["c",-2.846,0,-5.874,-3.47,-9.078,-3.116],["c",-3.206,0.356,-5.521,2.137,-5.698,6.678],["c",-0.179,4.541,1.869,5.251,1.869,5.251],["c",-0.801,-0.443,-0.891,-1.067,-0.891,-3.473],...
..and that's only 5th (!) part of the entire output!
What's going on here? Well, it turns out that this
fabric.Path instance — this shape — consists of literally hundreds of bezier lines dictating how exactly it is to be rendered. All those ["c",0,2.67,-0.979,5.253,-2.048,9.079] chunks in JSON representation correspond to each one of such curves. And when there's hundreds (or even thousands) of them, the canvas representation ends up being quite enormous.
What to do?
This is when
fabric.Canvas#toDatalessJSON comes handy. Let's try it:canvas.item(0).sourcePath = '/assets/dragon.svg'; console.log(JSON.stringify(canvas.toDatalessJSON()));
..and the logged output is:
{"objects":[{"type":"path","left":143,"top":143,"width":175,"height":151,"fill":"#231F20","overlayFill":null,"stroke":null,"strokeWidth":1,"strokeDashArray":null,"scaleX":1,"scaleY":1,"angle":-19,"flipX":false,"flipY":false,"opacity":1,"selectable":true,"hasControls":true,"hasBorders":true,"hasRotatingPoint":false,"transparentCorners":true,"perPixelTargetFind":false,"path":"/assets/dragon.svg"}],"background":"rgba(0, 0, 0, 0)"}
Well, that's certainly smaller! So what happened? Notice how before calling
toDatalessJSON, we gave the path (dragon shape) object "sourcePath" property of "/assets/dragon.svg". Then, when we called toDatalessJSON the entire humongous path string from previous output (those hundreds of path commands) was replaced with a single "dragon.svg" string. You can see it highlighted above.
When working with lots of complex shapes,
toDatalessJSON allows us to do reduce canvas representation even further and replace huge path data representaion with a simple link to SVG.
And now getting back to
loadFromDatalessJSON method... you can probably guess that it simply allows to load canvas from a dataless version of canvas representation. loadFromDatalessJSON pretty much knows how to take those "path" strings (like "/assets/dragon.svg"), load them, and use as the data for corresponding path objects.
Now, let's take a look at SVG-loading methods. We can either use string or URL:
fabric.loadSVGFromString('...', function(objects, options) {
  var obj = fabric.util.groupSVGElements(objects, options);
  canvas.add(obj).renderAll();
});
First argument is the SVG string, second one is the callback function. The callback is invoked when SVG is parsed and loaded and receives 2 arguments —
objects and options. objects contains an array of objects parsed from SVG — paths, path groups (for complex objects), images, text, and so on. In order to group all of those objects into a cohesive collection, and to make them look the same way as they are in SVG document, we're using fabric.util.groupSVGElements passing it both objects and options. In return, we get either an instance of fabric.Pathor fabric.Group, which we can then add onto canvas.fabric.loadSVGFromURL works the same way, except that you pass string containing URL rather than SVG contents. Note that Fabric will attempt to fetch that URL via XMLHttpRequest, so the SVG needs to conform to the usual SOP rules.Subclassing
Since Fabric is built in a truly object-oriented fashion, it's designed to make subclassing and extension simple and natural. As you know from 1st part of this series, there's an existing hierarchy of objects in Fabric. All 2D objects (paths, images, text, etc.) inherit from
fabric.Object, and some "classes" — like fabric.IText — even form 3-level inheritance.
So how would we go about subclassing one of the existing "classes" in Fabric? Or maybe even creating our own?
For this task we'll need
fabric.util.createClass utility method. createClass is nothing but a simple abstraction over Javascript's prototypal inheritance. Let's first create a simple Point "class":var Point = fabric.util.createClass({
initialize: function(x, y) {
this.x = x || 0;
this.y = y || 0;
},
toString: function() {
return this.x + '/' + this.y;
}
});
createClass takes an object and uses that object's properties to create "class" with instance-level properties. The only specially-treated property is "initialize", which is used as constructor. So now when initializing Point, we'll create an instance with "x" and "y" properties, and "toString" method:var point = new Point(10, 20); point.x; // 10 point.y; // 20 point.toString(); // "10/20"
If we wanted to create a child of "Point" class — say a colored point, we would use
createClass like so:var ColoredPoint = fabric.util.createClass(Point, {
initialize: function(x, y, color) {
this.callSuper('initialize', x, y);
this.color = color || '#000';
},
toString: function() {
return this.callSuper('toString') + ' (color: ' + this.color + ')';
}
});
Notice how the object with instance-level properties is now passed as a second argument. And first argument receives
Point "class", which tells createClass to use it as a parent "class" of this one. In order to avoid duplication, we're using callSuper method, which calls the method of a parent "class". This means that if we were to change Point, the changes would also propagate to ColoredPoint one. To see ColoredPoint in action:var redPoint = new ColoredPoint(15, 33, '#f55'); redPoint.x; // 15 redPoint.y; // 33 redPoint.color; // "#f55" redPoint.toString(); "15/35 (color: #f55)"
So now that we went over creating our own "classes" and "subclasses", let's see how to work with already-existing Fabric ones. For example, let's create a
LabeledRect "class" which will essentially be a rectangle that has some kind of label associated with it. When rendered on canvas, that label will be represented as a text inside rectangle. Something similar to previous group example with circle and text. As you're working with Fabric, you'll notice that combined abstractions like this could be achieved either by using groups or by using custom classes.var LabeledRect = fabric.util.createClass(fabric.Rect, {
type: 'labeledRect',
initialize: function(options) {
options || (options = { });
this.callSuper('initialize', options);
this.set('label', options.label || '');
},
toObject: function() {
return fabric.util.object.extend(this.callSuper('toObject'), {
label: this.get('label')
});
},
_render: function(ctx) {
this.callSuper('_render', ctx);
ctx.font = '20px Helvetica';
ctx.fillStyle = '#333';
ctx.fillText(this.label, -this.width/2, -this.height/2 + 20);
}
});
It seems like there's quite a lot going on here, but it's actually pretty simple.
First, we're specifying parent "class" as
fabric.Rect, to utilize its rendering abilities. Next, we define "type" property, setting it to "labeledRect". This is just for consistency, since all Fabric objects have type property (rect, circle, path, text, etc.) Then there's already-familiar constructor (initialize) in which we're utilizing callSuper once again. Additionally, we set object's label to whichever value was passed via options. Finally, we're left with 2 methods - toObject and _render. toObject, as you already know from serialization chapter, is responsible for object (and JSON) representation of an instance. Since LabeledRect has the same properties as regular rect, but also a label, we're extending parent's toObject method and simply adding label into it. Last but not least, _rendermethod is what's responsible for actual drawing of an instance. There's another callSuper call in it, which is what renders rectangle, and additional 3 lines of text-rendering logic.
Now, if we were to render such object:
var labeledRect = new LabeledRect({
  width: 100,
  height: 50,
  left: 100,
  top: 100,
  label: 'test',
  fill: '#faa'
});
canvas.add(labeledRect);
..we would get this:
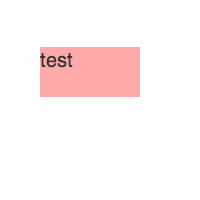
Changing label value or any other usual rectangle properties would obviously work as expected:
labeledRect.set({
  label: 'trololo',
  fill: '#aaf',
  rx: 10,
  ry: 10
});

Of course at this point, you're free to modify behavior of this "class" any way you want. For example, making certain values default, to avoid passing them every time to constructor. Or making certain configurable properties available on the instance. If you do make additional properties configurable, you might want to account for them in
toObject and initialize:...
initialize: function(options) {
options || (options = { });
this.callSuper('initialize', options);
// give all labeled rectangles fixed width/heigh of 100/50
this.set({ width: 100, height: 50 });
this.set('label', options.label || '');
}
...
_render: function(ctx) {
// make font and fill values of labels configurable
ctx.font = this.labelFont;
ctx.fillStyle = this.labelFill;
ctx.fillText(this.label, -this.width/2, -this.height/2 + 20);
}
Arquitecto especialista en gestion de proyectos si necesitas desarrollar algun proyecto en Bogota contactame en el 3006825874 o visita mi pagina en www.arquitectobogota.tk
0 comentarios:
Publicar un comentario