
N64/Snes/Nes controller to gamecube/Wii conversion project
Contents
- Project overview
- Compatibilty
- SNES Support
- NES Support
- N64 Support
- Schematic
- Printed circuit board (PCB)
- Firmware
- Pictures
- User pictures
- Links
- Disclaimer
Project overview
 Nintendo's idea of implementing support for NES, SNES and N64 games in their new console, the Wii, is in my opinion one of their greatest ideas. As soon as I learned that it would be possible to use Gamecube controllers to play those games, I started thinking about designing an Snes/Nes controllers to Gamecube adapter which would be compatible with the Wii.
Update!: Since the Wii U and new Wii models are built without gamecube ports, I have created a new project that works via the Wiimote, making it possible to continue enjoying the classics with proper controllers.
As soon as I got access to a Wii (I still dont have mine), I started testing my code which I had prepared in advance. I started by doing the NES and SNES adapter. Later, since a friend kept insisting that I should also design a N64 to Gamecube/Wii adapter, I implemented such an adapter.
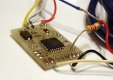
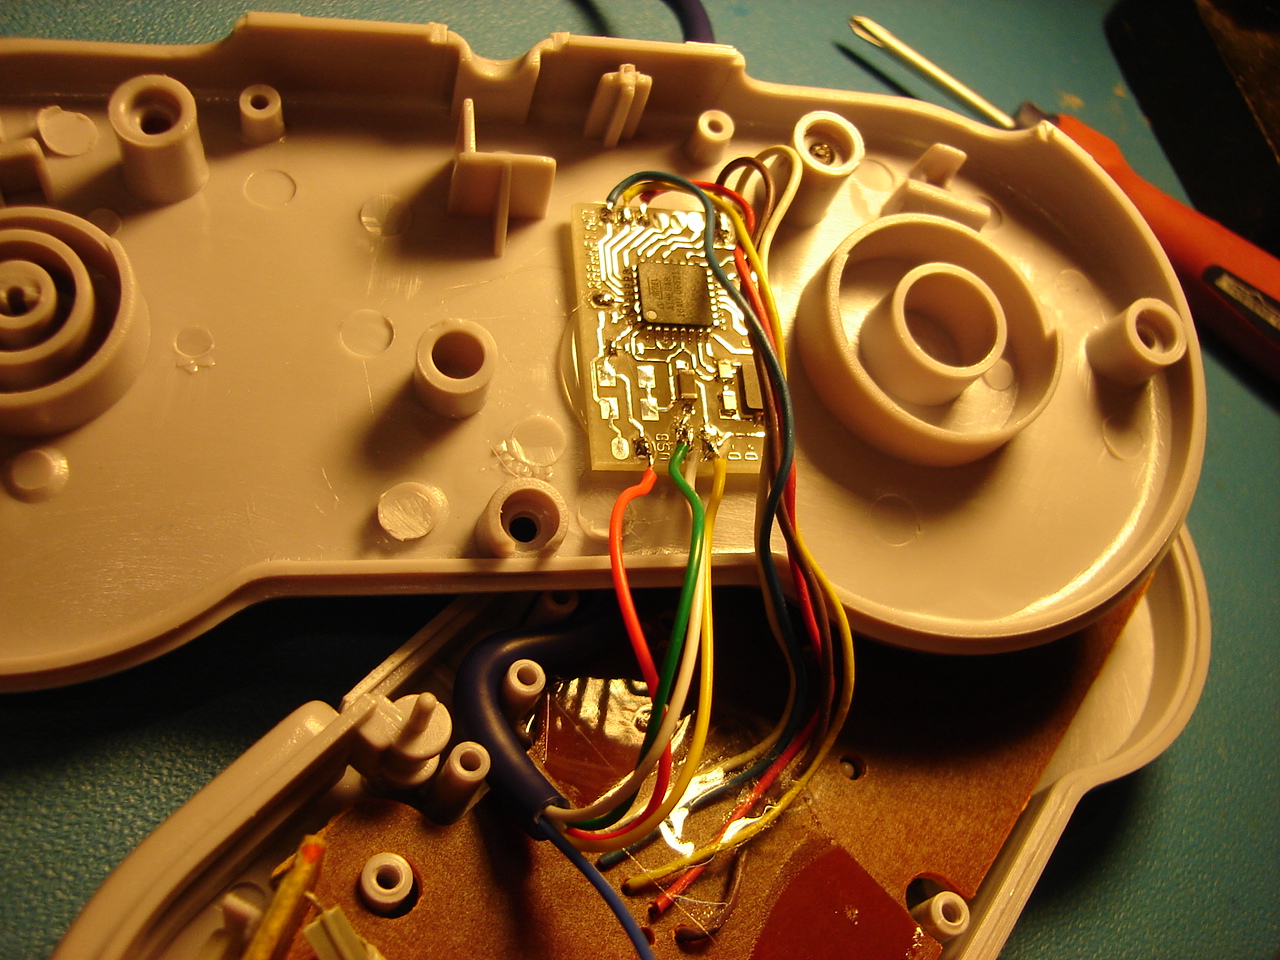
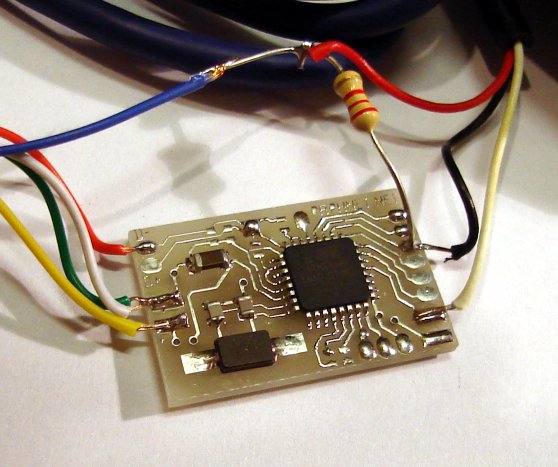
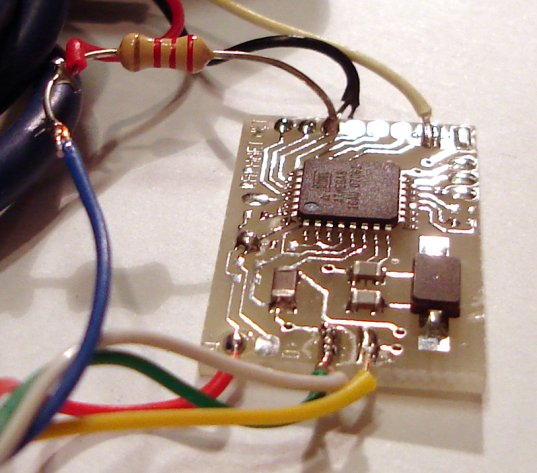
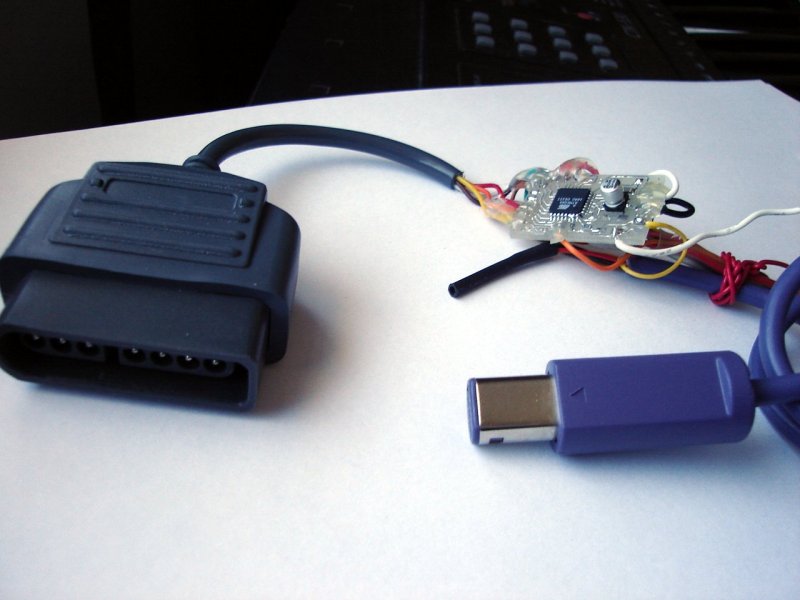
Because of the complexity of the Gamecube's controller protocol, it's not possible to build a simple conversion circuit without using programmable components. For this project, I used an atmel Atmega8 microcontroller. Maybe it's a little overkill, but using this chip allowed me to use my Multiuse tiny 1 PCB. Given the small size of this circuit, it's possible to fit it inside an original controller.
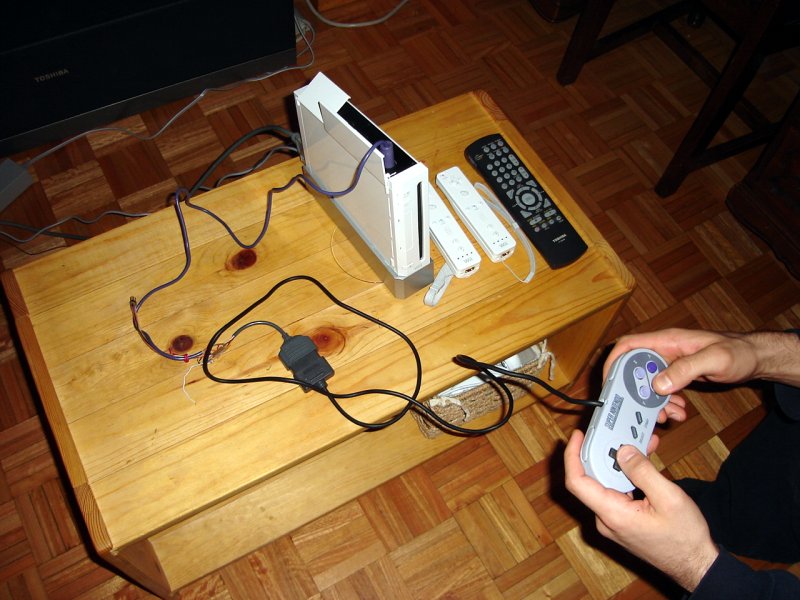
Here are a few example of what can be done with this circuit:

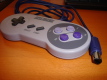
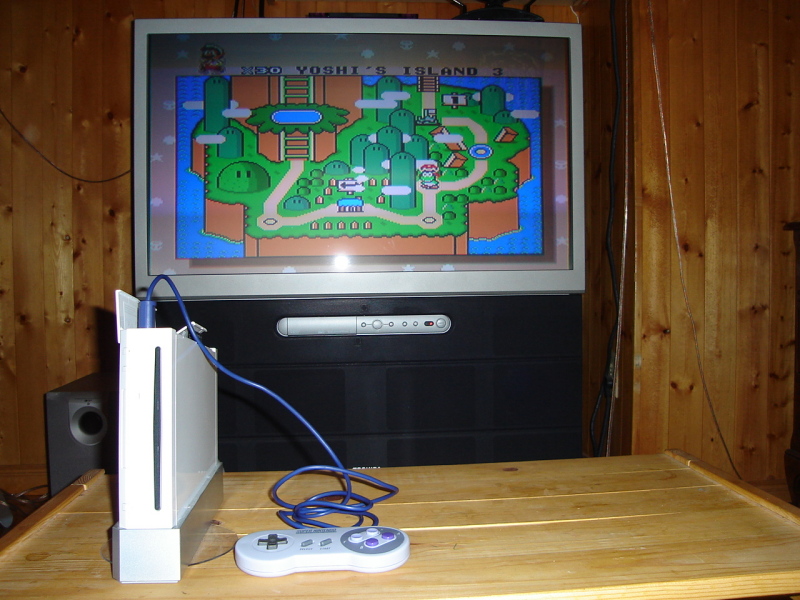
An Snes controller clone converted to Gamecube/Wii
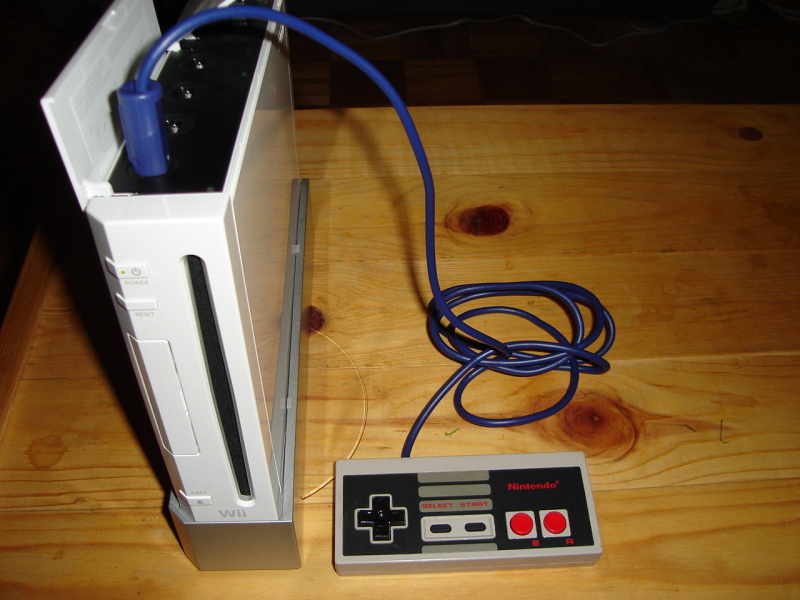
A NES controller converted to Gamecube/Wii

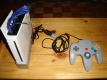
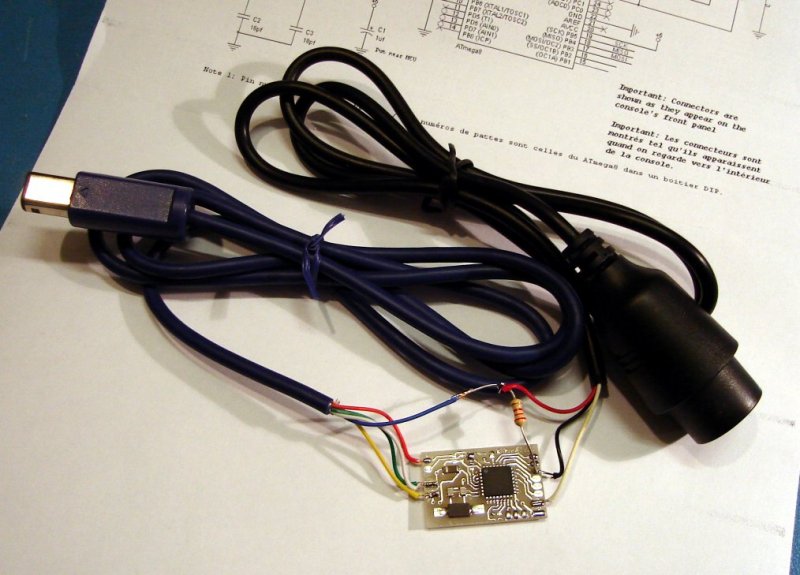
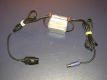
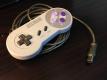
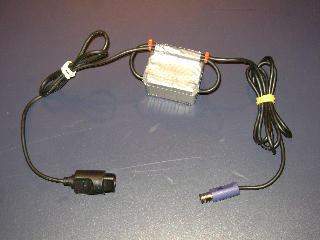
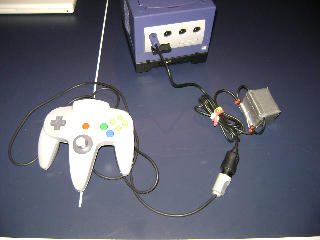
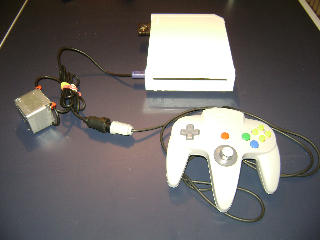
N64 controller to Gamecube/Wii adapter cable
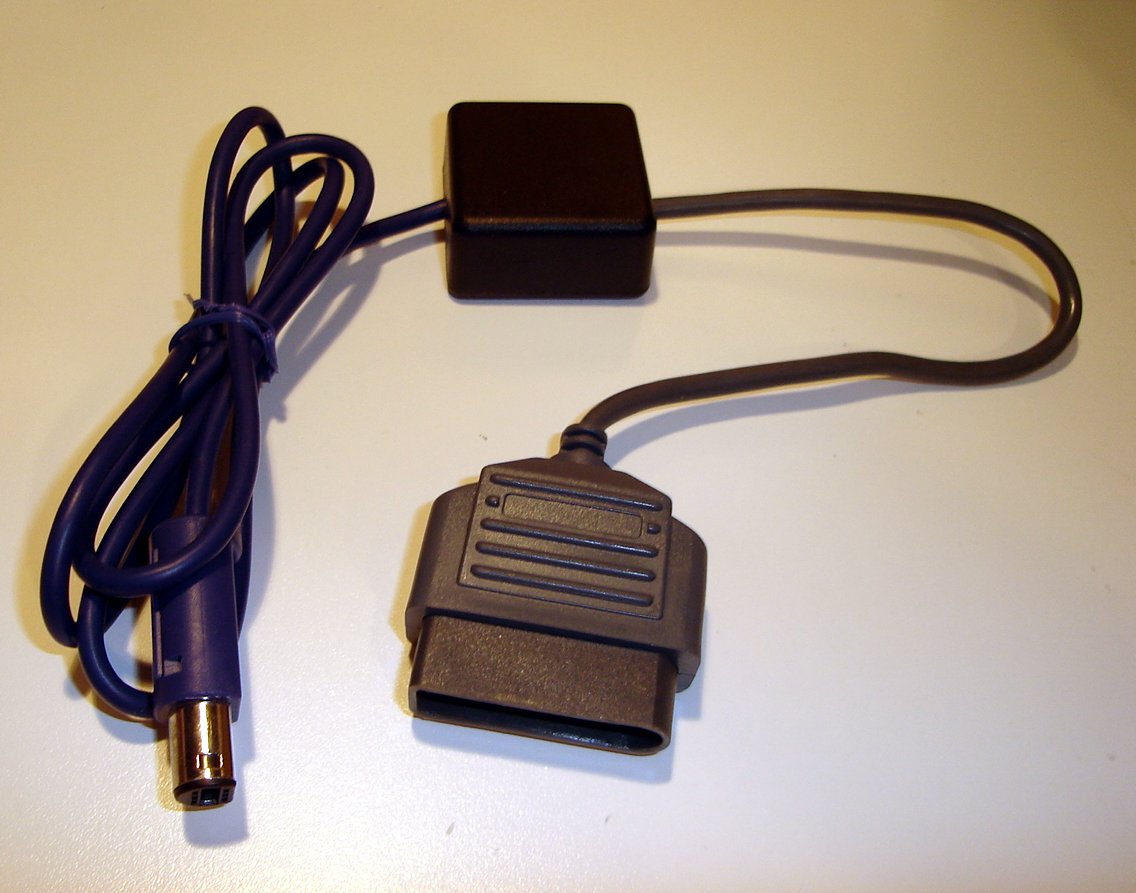
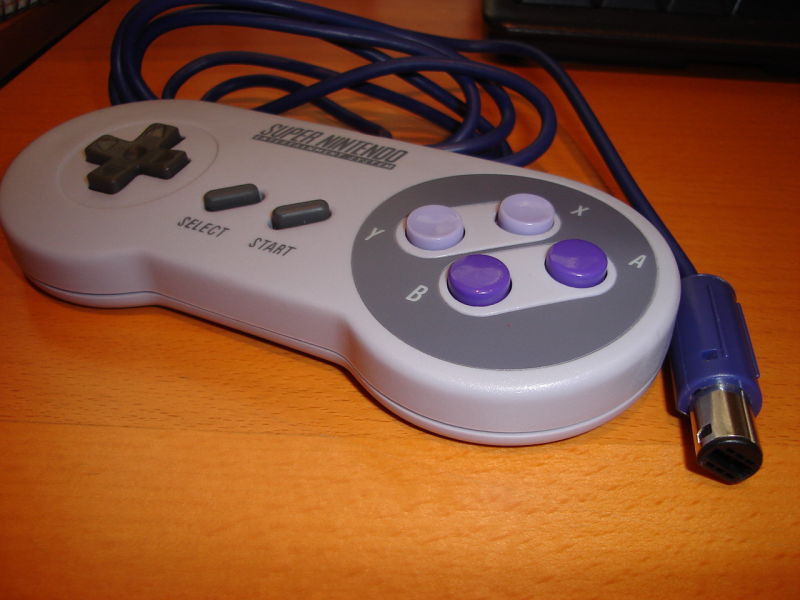
Snes controller to Gamecube/Wii adapter cable
(for more pictures, visit the pictures section)
 Preassembled N64 to Gc/Wii adapters available
Compatibilty
2015-12-26: As I have been asked many times if the adpater is compatible with something, I decided to create this table. The adapter should work with all games or systems supporting Gamecube controllers, but there are exceptions.
[1] Adapters, games or system polling the controller (in fact, the adapter) at high frequency (i.e. More than 60Hz) prevent the adapter from working correctly.

| Game/system/controller | Compatible? |
|---|---|
| Virtual console games on Wii | Yes |
| Not64 emulator | Yes |
| Mario Kart Wii | Yes |
| Hori mini 64 controller | Yes |
| Homebrew browser | Yes |
| Wii U | No as there are no Gamecube ports. |
| Gamecube adapter for Wii U | No[1] |
| Gameboy player and SNES adapter | Yes |
| Gameboy player and N64 adapter | No[1] |
SNES Support
| SNES mode | |
|---|---|
| SNES | Gamecube |
| Start | Start |
| Select | Z |
| DPAD | DPAD |
| Y,X,B,A,L,R | Y,X,B,A,L,R |
| L+R+Select+left | Cstick to the left[1] |
| NES mode 1 | |
|---|---|
| SNES | Gamecube |
| Start | Start |
| Select | Z |
| DPAD | DPAD |
| Y,B | B,A |
| Y+B+Select+left | Cstick to the left[1] |
| Y+B+Select+up | L+R |
| NES mode 2 | |
|---|---|
| SNES | Gamecube |
| Start | Start |
| Select | Z |
| DPAD | DPAD |
| Y,B | A,B |
| Y+B+Select+left | Cstick to the left[1] |
| Y+B+Select+up | L+R |
Enabling a mapping:
- SNES mode: Default mapping.
- NES mode 1: Hold START at power up.
- NES mode 2: Hold START, Y and B at power up.
- Official Nintendo controllers (North america, Europe and Japan)
- Most, if not all, third party controllers.
- The "Hori Super Game Boy Controller"
[1]Before firmware version 1.4, this combo sent the C-Stick to the right
NES Support
| NES mode 1 | |
|---|---|
| NES | Gamecube |
| Start | Start |
| Select | Z |
| DPAD | DPAD |
| A,B | A,B |
| A+B+Select+left | Cstick to the left[1] |
| A+B+Select+up | L+R |
| NES mode 2 | |
|---|---|
| NES | Gamecube |
| Start | Start |
| Select | Z |
| DPAD | DPAD |
| A,B | B,A |
| A+B+Select+left | Cstick to the left[1] |
| A+B+Select+up | L+R |
| NES mode 3 | |
|---|---|
| NES | Gamecube |
| Start | Start |
| Select | Y |
| DPAD | DPAD |
| A,B | A,B |
| A+B+Select+left | Z |
| A+B+Select+up | X |
Enabling a mapping:
- NES mode 1: Default mode.
- NES mode 2: Hold A and B down when connecting the adapter.
- NES mode 3: Not implemented yet.
[1]Before firmware version 1.4, this combo sent the C-Stick to the right
N64 Support
N64 version:
The adapter supports many different mappings, which are appropriate for a wide range of Wii virtual console and Gamecube games. Here's a file containing a table of the different mappings supported:
n64_mapping_table1.4.pdf
The adapter supports many different mappings, which are appropriate for a wide range of Wii virtual console and Gamecube games. Here's a file containing a table of the different mappings supported:
n64_mapping_table1.4.pdf
Schematic
Here is a picture of the schematic. Click for bigger version:
Comments and explainations:
The microcontroller is powered with 5 volts for three reasons:
The N64 version uses the same technique to control the controller's data line. The only difference is that we have to provide the 3.43 volts pullup resistor. (From the controller's point of view, we're the console!)
FAQ:
Q: Why did'nt you use the Wiimote accessory connector instead of doing a Gamecube adapter?
A: I considered it, but I decided that using the Gamecube ports was better. Here are a few reasons:
| Nes/Snes version: | N64 version: |
|---|---|
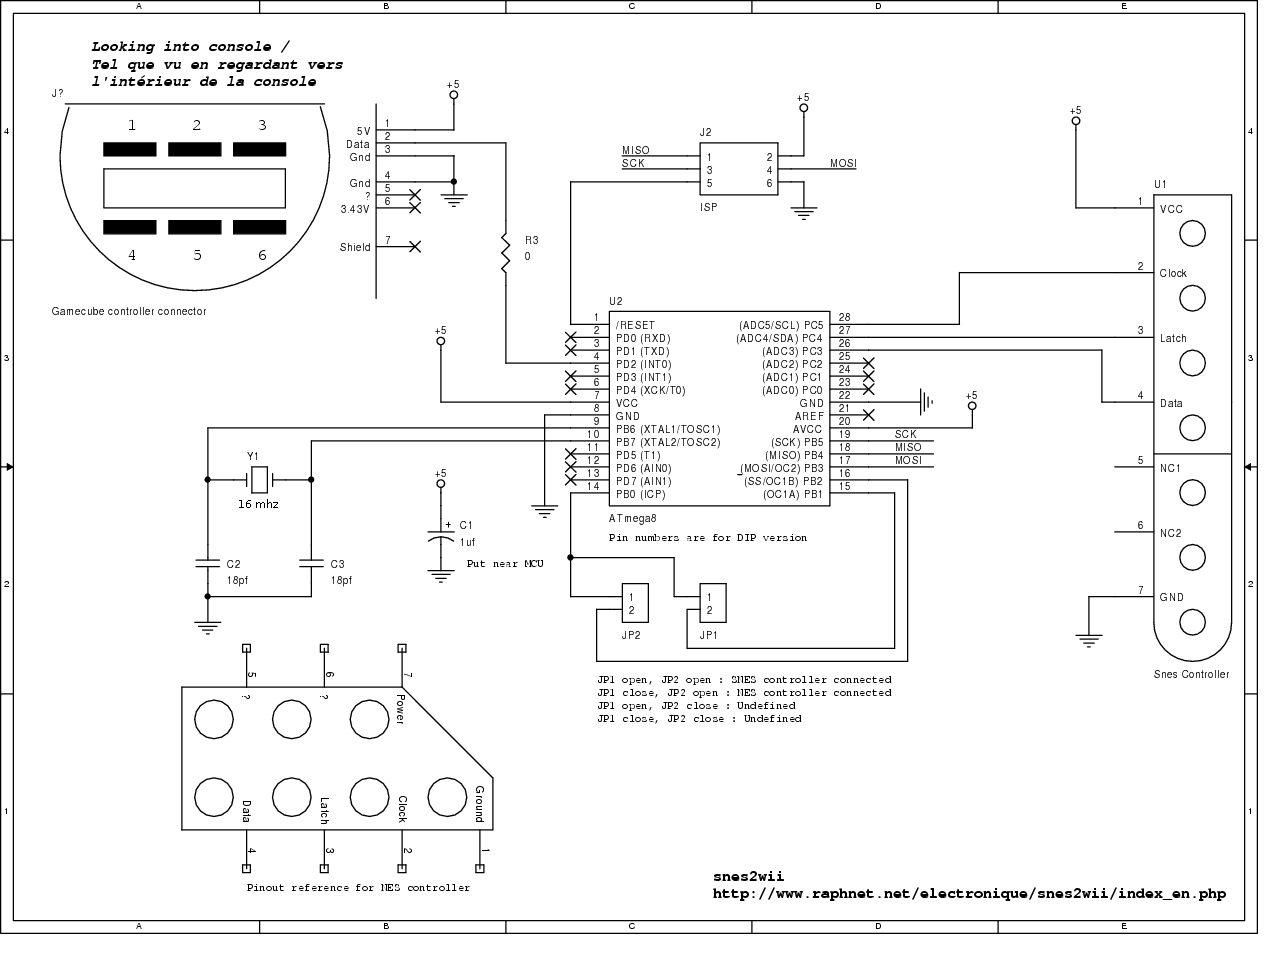 | 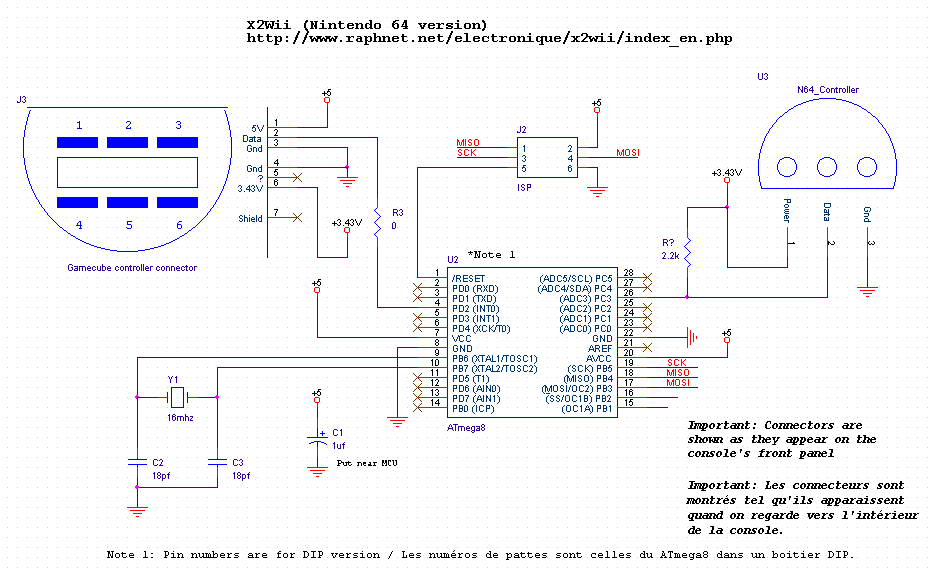 |
The microcontroller is powered with 5 volts for three reasons:
- Snes and Nes controllers work at 5 volts. This means that it's better to use 5 volts for a logic 1 when driving the controller's CLock and Latch pins. (As I dont have the official controller specifications, I cannot know for sure what is the voltage threshold for a logic 1.
- The data signal from the controller is at 5 volts when high. To prevent exposing the microcontroller input to voltages higher than it's own, it would have been necessary to use a voltage divider which would have required two additional resistors.
- If I had powered the MCU with only 3.3 volts, I would have had to use an ATmega8L which cannot run at clock rates above 8 mhz.
The N64 version uses the same technique to control the controller's data line. The only difference is that we have to provide the 3.43 volts pullup resistor. (From the controller's point of view, we're the console!)
FAQ:
Q: Why did'nt you use the Wiimote accessory connector instead of doing a Gamecube adapter?
A: I considered it, but I decided that using the Gamecube ports was better. Here are a few reasons:
- NES and SNES controllers use 5 volts. If I remember correctly, there is no 5 volts in the Wiimote connector. This means that I would need to build a step-up switching voltage regulator. Higher cost, Higher complexity.
- NES and SNES controllers were designed to be wired controllers. This means that they probably did not have low power consumption in mind when the designed it. But I did not take the time to very that because of point #1
- The Connector is proprietary. Gamecube connectors are too, but they can be easily obtained from extension cables, which are cheap and easy to find. At the time, I failed to find wiimote extension cables
- NES/SNES (and other consoles) emulators on Wii are (or were, I have not checked recently) in fact Gamecube based. Since Gamecube games only support Gamecube accessory, implementing the adapter via the Wiimote would be useless.
- I'm not a big fan of wireless things. Besides, the NES/SNES controller cables never bothered me.
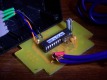
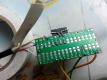
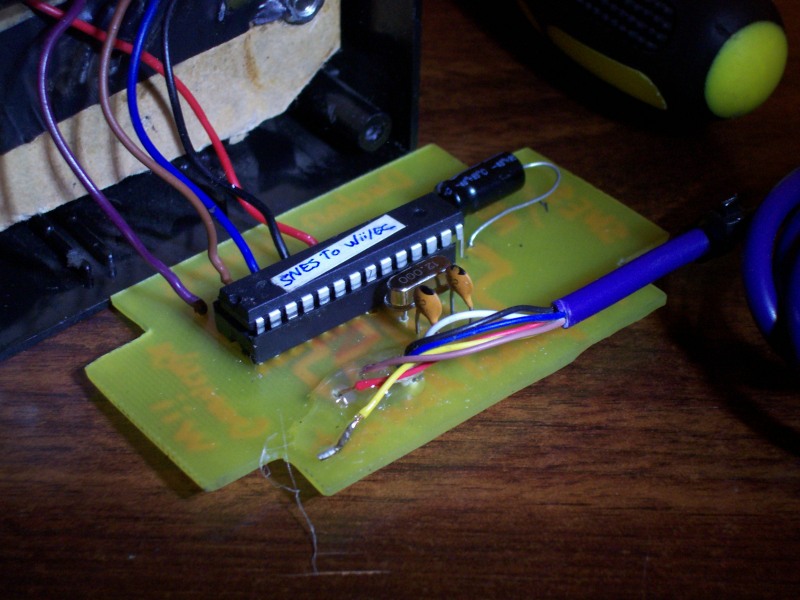
Printed circuit board (PCB)
As I said in the overview, I used my Multiuse tiny1 PCB. Refer to the Multiuse tiny1 page for more information. If you dont feel like building it yourself, I sell fully assembled PCBs with the MCU pre-programmed in my online shop.
Here are pictures and wiring diagrams:

When using the Multiuse tiny1 PCB for this project, only the following components are needed. Suggested Digikey part numbers are included:
Here are pictures and wiring diagrams:
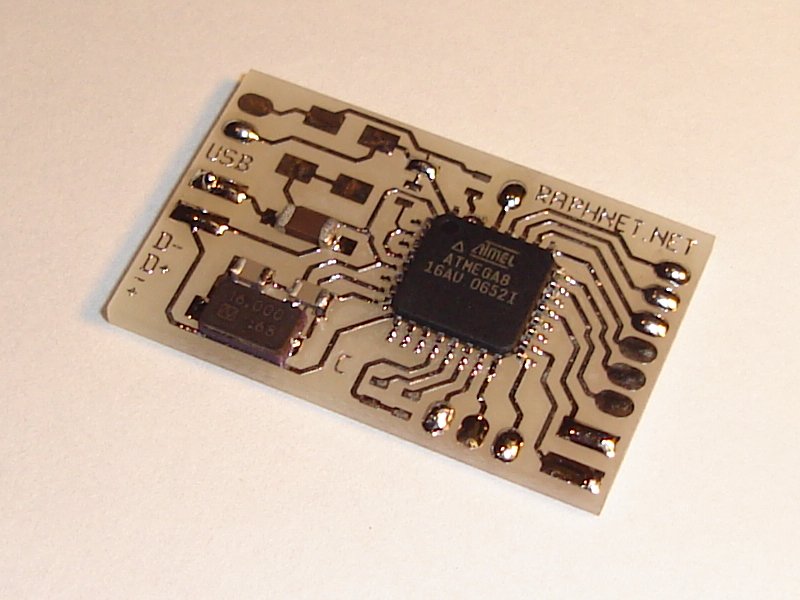
Very small PCB
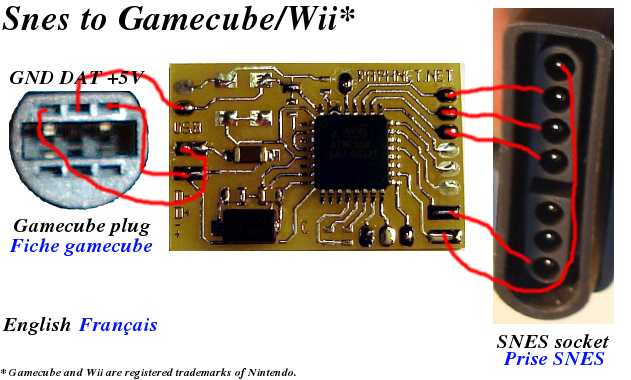
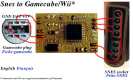
(S)NES Wiring diagram
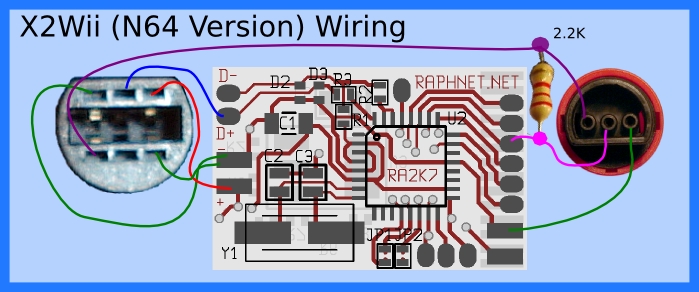
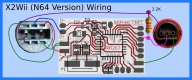
N64 Wiring diagram
When using the Multiuse tiny1 PCB for this project, only the following components are needed. Suggested Digikey part numbers are included:
| Reference | Description | Comments | Digikey part # |
|---|---|---|---|
| C1 | 10uf capacitor | 1uf is enough too. And smaller value capacitors are slimmer. | 490-1835-1-ND |
| C2,C3 | 18pf capacitor | Change as appropriate for crystal. | 311-1102-1-ND |
| Y1 | 16mhz crystal | Suggested part number is for a surface mount crystal. Can be easily soldered on the thru-hole footprint. | 644-1037-1-ND |
| R3,R5,R6 | 0 ohms resistor | You can do a solder bridge instead. | N/A |
| U2 | Atmega8 microcontroller | It is important that you use the family supporting a 16 mhz speed. The Atmega8L-* family does not go above 8mhz. | ATMEGA8-16AU-ND |
Firmware
NES/SNES to GC/Wii releases
| Version v1.5.1 March 26, 2016 (Saturday) |
|---|
Small corrections:
|
| File(s): snes2wii-1.5.1.m8.hex (3.3 KB) snes2wii-1.5.1.m168.hex (3.5 KB) snes2wii-1.5.1.tar.gz (16.1 KB) |
Show previous releases...
 This project is also available on GitHub!
To request features, report issues or contribute, you may send me an email or use the GitHub repository:
https://github.com/raphnet/snes2wii
N64 to GC/Wii releases
| Version v1.7 February 11, 2016 (Thursday) |
|---|
|
| File(s): n64_to_wii-1.7.tar.gz (85.3 KB) n64_to_wii-1.7.m8.hex (5.7 KB) n64_to_wii-1.7.m88.hex (5.7 KB) n64_to_wii-1.7.m168.hex (5.9 KB) |
Show previous releases...
This project is also available on GitHub!To request features, report issues or contribute, you may send me an email or use the GitHub repository:
https://github.com/raphnet/n64_to_wii
For this project, the appropriate fuse values are:
- ATMEGA168 builds: high byte = 0xdc, low byte = 0xd7, extended byte = 0x01
- ATMEGA88 builds: high byte = 0xd9, low byte = 0xdf, extended byte = 0x07
- ATMEGA8 builds: high byte = 0xc9, low byte = 0x9f
For details about how to program an AVR, visit my AVR programming page.
I coded the project in avr-as (gnu) assembler. A makefile is included. Why I used assembly language? Mostly for speed and timing control. The smallest time unit in the gamecube controller protocol is of 1us, which corresponds to only 16 cpu cycles at 16 mhz. Not much time to waste at that speed. Because I used assembly, many optimisations tricks were possible.
Pictures
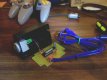
Converting a NES controller: (Beware: Clone controllers use different colors)

Converting an SNES controller: (Beware: Clone controllers use different colors)

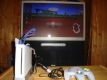
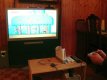
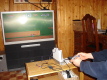
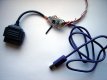
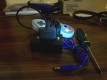
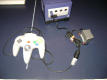
Nintendo 64 version:


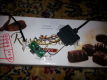
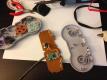
Pictures taken during the development and debugging:


Pictures taken during tests, when it was finally working:

The prototype:


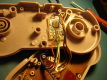
Inside an original NES controller

Result
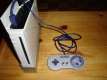
Next to the Wii
Super mario bros
Converting an SNES controller: (Beware: Clone controllers use different colors)
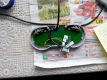
Inside an SNES controller clone
Result
Next to the Wii
Super mario world
Nintendo 64 version:


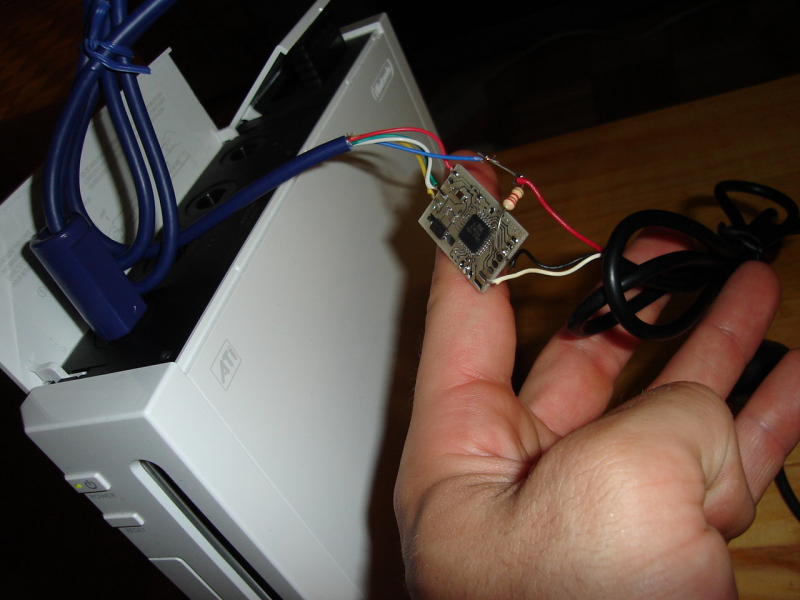
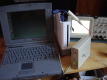
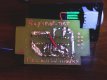
Pictures taken during the development and debugging:
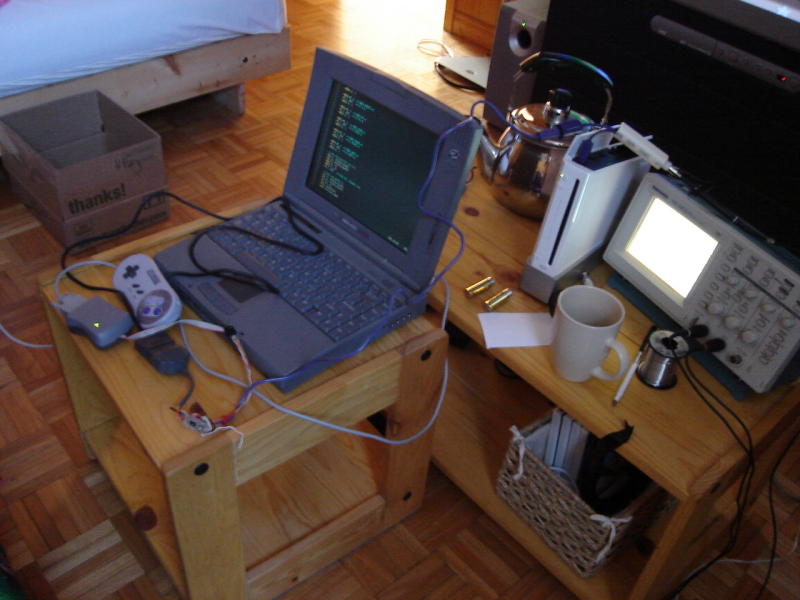
The development was done at my Lucky-Wii-owner friend's place...

Analysing the protocol with an home-made tool.
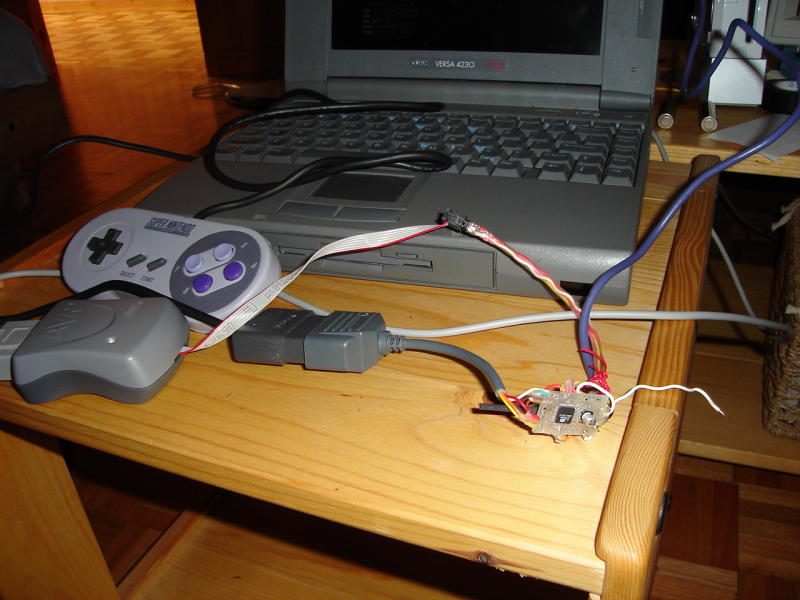
Reprogramming the adapter

It almost works... The Wii recognizes the controller!
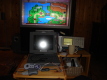
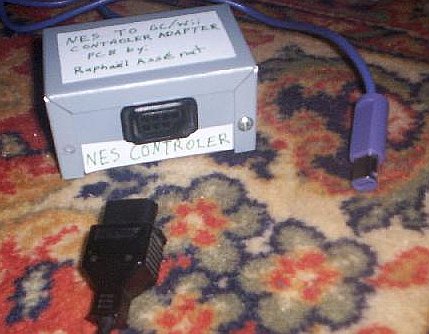
Pictures taken during tests, when it was finally working:


The prototype:

Overview
Closer view
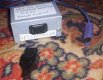
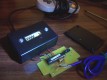
User pictures
I like to see how others build my projects. It also makes good assembly examples. Please send me your pictures and I'll add them here.
Andrew Jalics has posted pictures of the NES to Wii box he build using my PCB on his web site.:
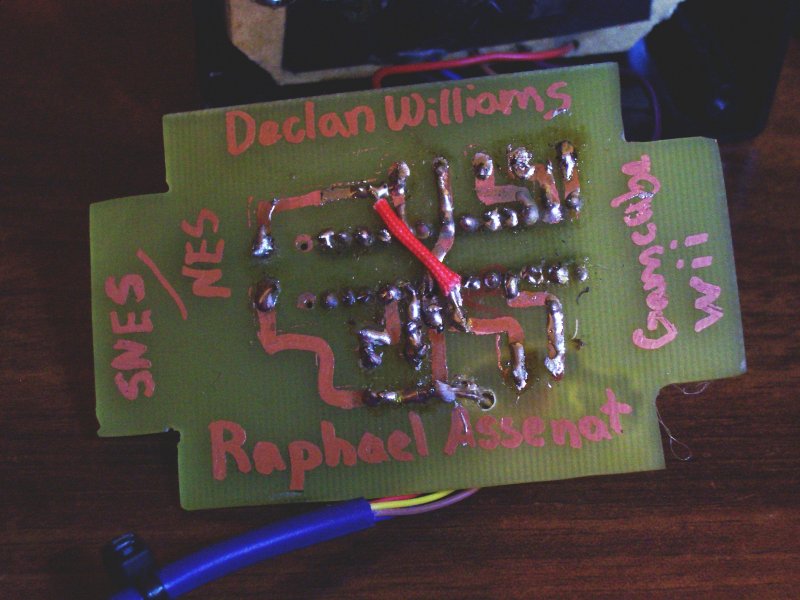
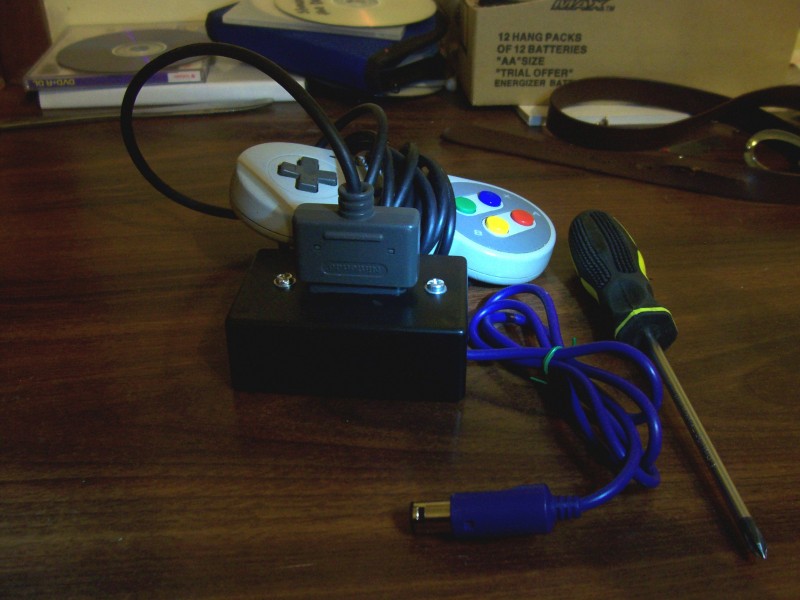
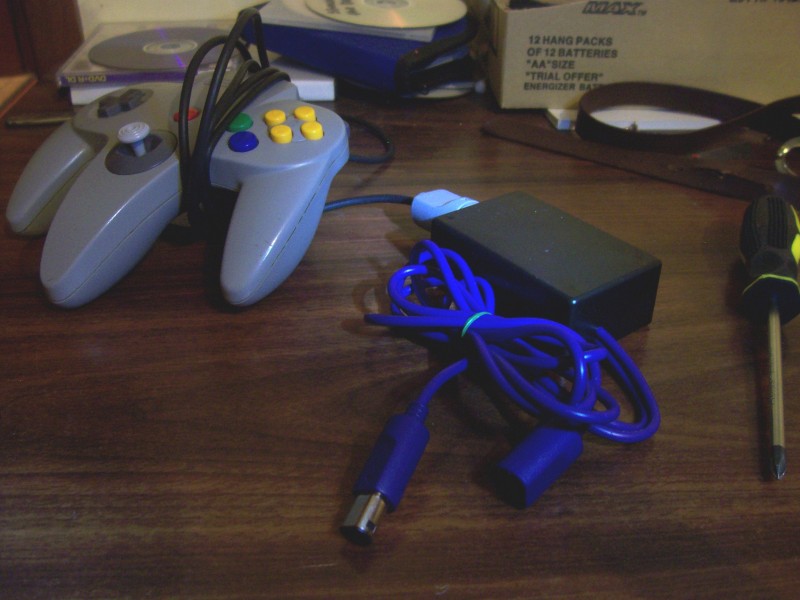
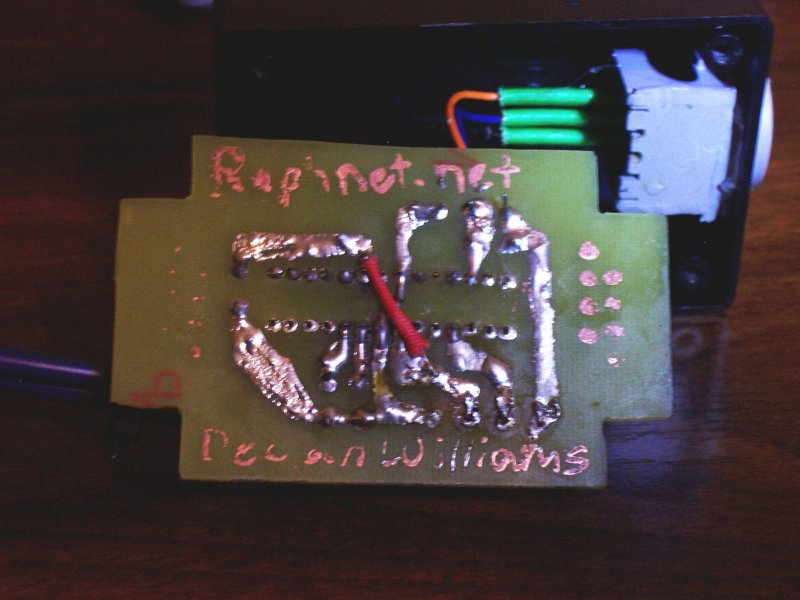
Declan Williams, from Autralia, built the Nes/Snes and N64 versions. He used pre-programmed chips from my store and created his own PCBs. He also built his own SNES style connector ( details visible on his 4nes4snes pictures):


June 5, 2009: Andrew Kay sent me the following pictures of the adapter he built:

July 19, 2014 (Saturday)
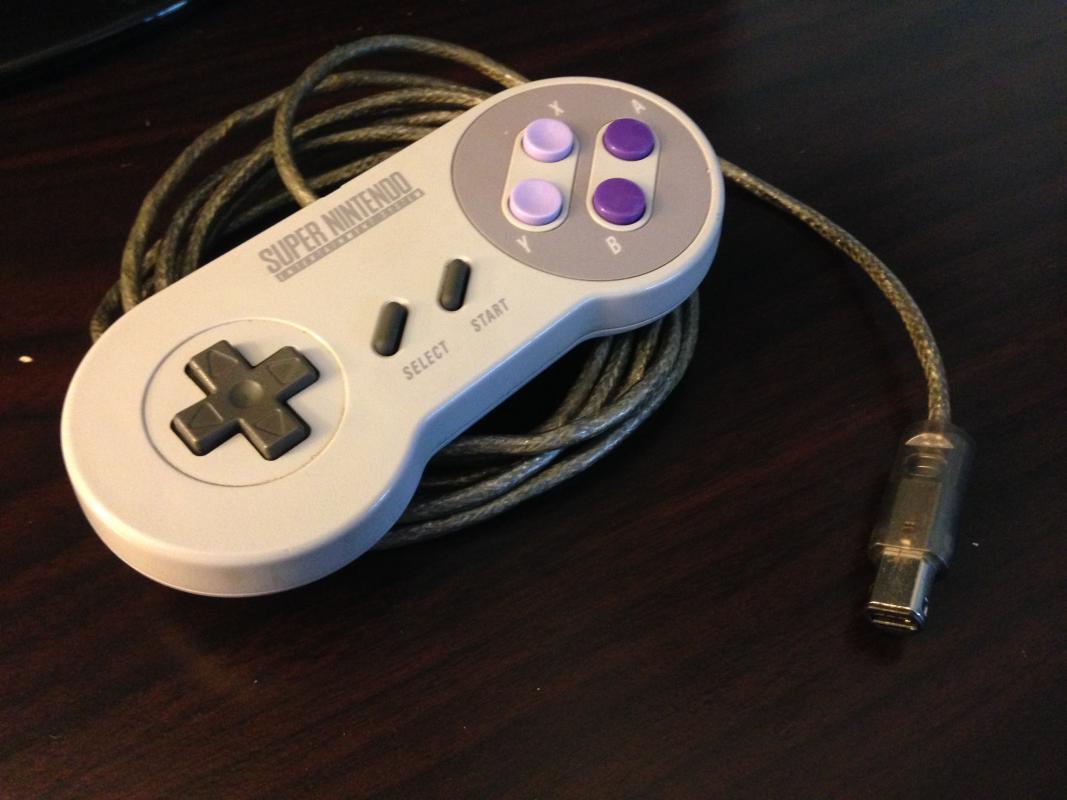
TALENTO from Bulgaria sent me pictures of the SNES to Wii/Gamecube adapter he built using a generic board bought on eBay.

.jpg)
July 19, 2014 (Saturday)
Jonathan sent me the following pictures of a controller he converted:
Andrew Jalics has posted pictures of the NES to Wii box he build using my PCB on his web site.:
Declan Williams, from Autralia, built the Nes/Snes and N64 versions. He used pre-programmed chips from my store and created his own PCBs. He also built his own SNES style connector ( details visible on his 4nes4snes pictures):


June 5, 2009: Andrew Kay sent me the following pictures of the adapter he built:
July 19, 2014 (Saturday)
TALENTO from Bulgaria sent me pictures of the SNES to Wii/Gamecube adapter he built using a generic board bought on eBay.

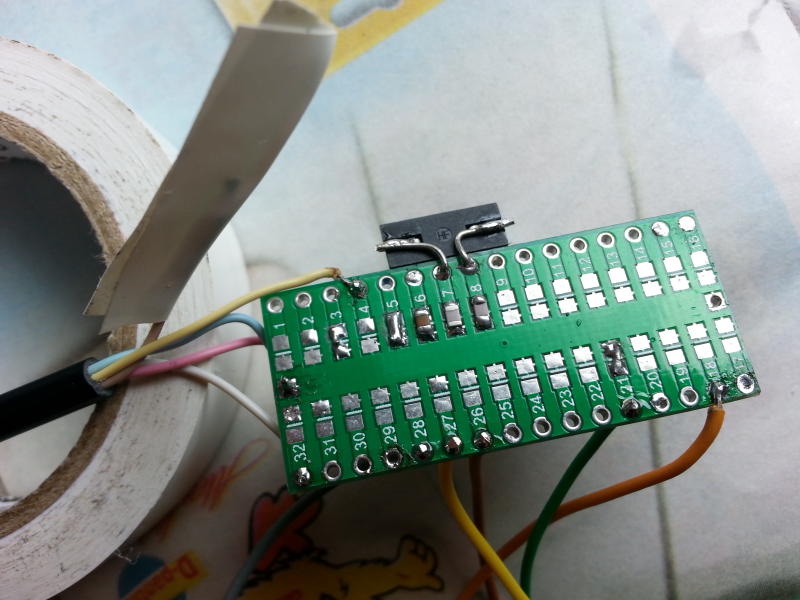
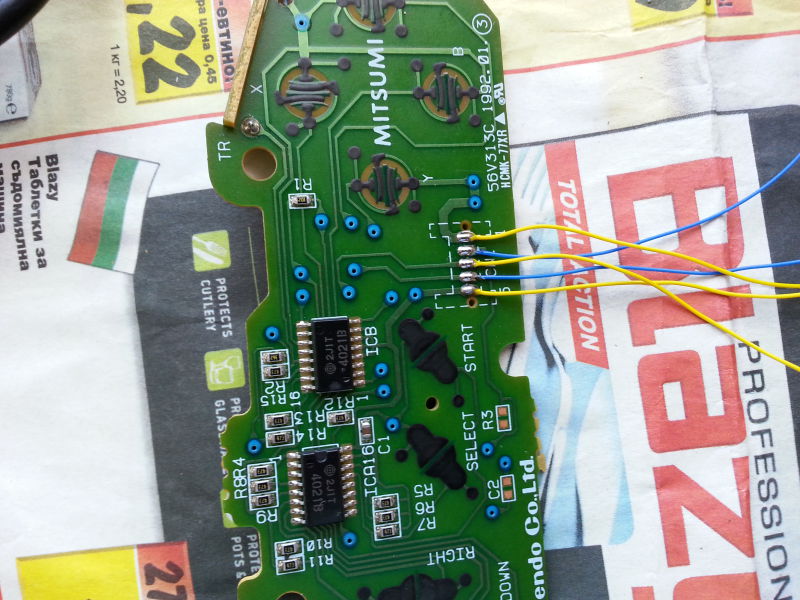
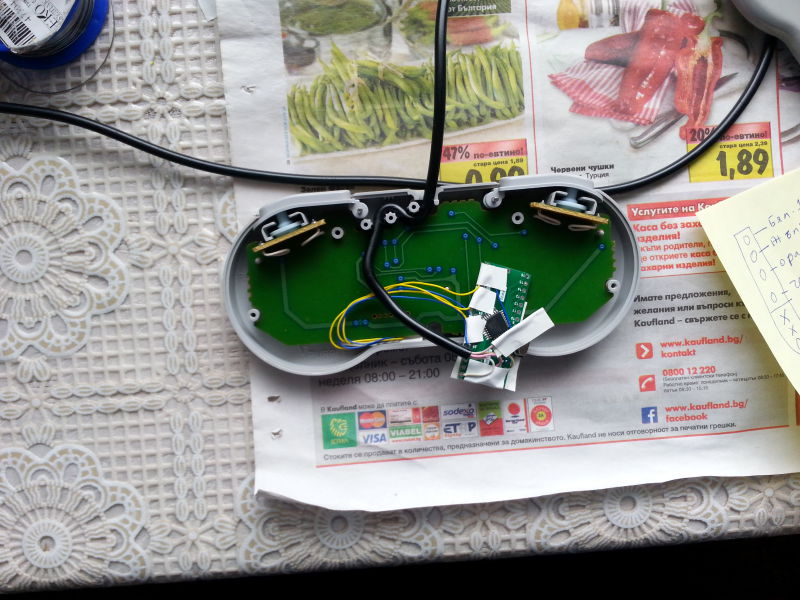
.jpg)
July 19, 2014 (Saturday)
Jonathan sent me the following pictures of a controller he converted:

Links
This document clearly explains the low level communication of the gamecube controllers:
Nintendo Gamecube Controller Protocol
This document contains a section (#9) with information on the bit significations of the controller replies to various commands:
Yet Another Gamecube Documentation
This page contains documentation about the snes controller 'protocol':
Sci.Electronics FAQ: Super Nintendo Entertainment System: pinouts & protocol
Disclaimer
I cannot be held responsible for any damages that could occur to you or your equipment while following the procedures present on this page. Also, I GIVE ABSOLUTELY NO WARRANTY on the correctness and usability of the informations on this page. Please note, however, that the procedures above have worked in my case without any damages or problems.
Now you cannot say that I did not warn you :)
Now you cannot say that I did not warn you :)
Website coded with | Last update: October 15, 2016 (Saturday) |
Arquitecto especialista en gestion de proyectos si necesitas desarrollar algun proyecto en Bogota contactame en el 3006825874 o visita mi pagina en www.arquitectobogota.tk
0 comentarios:
Publicar un comentario